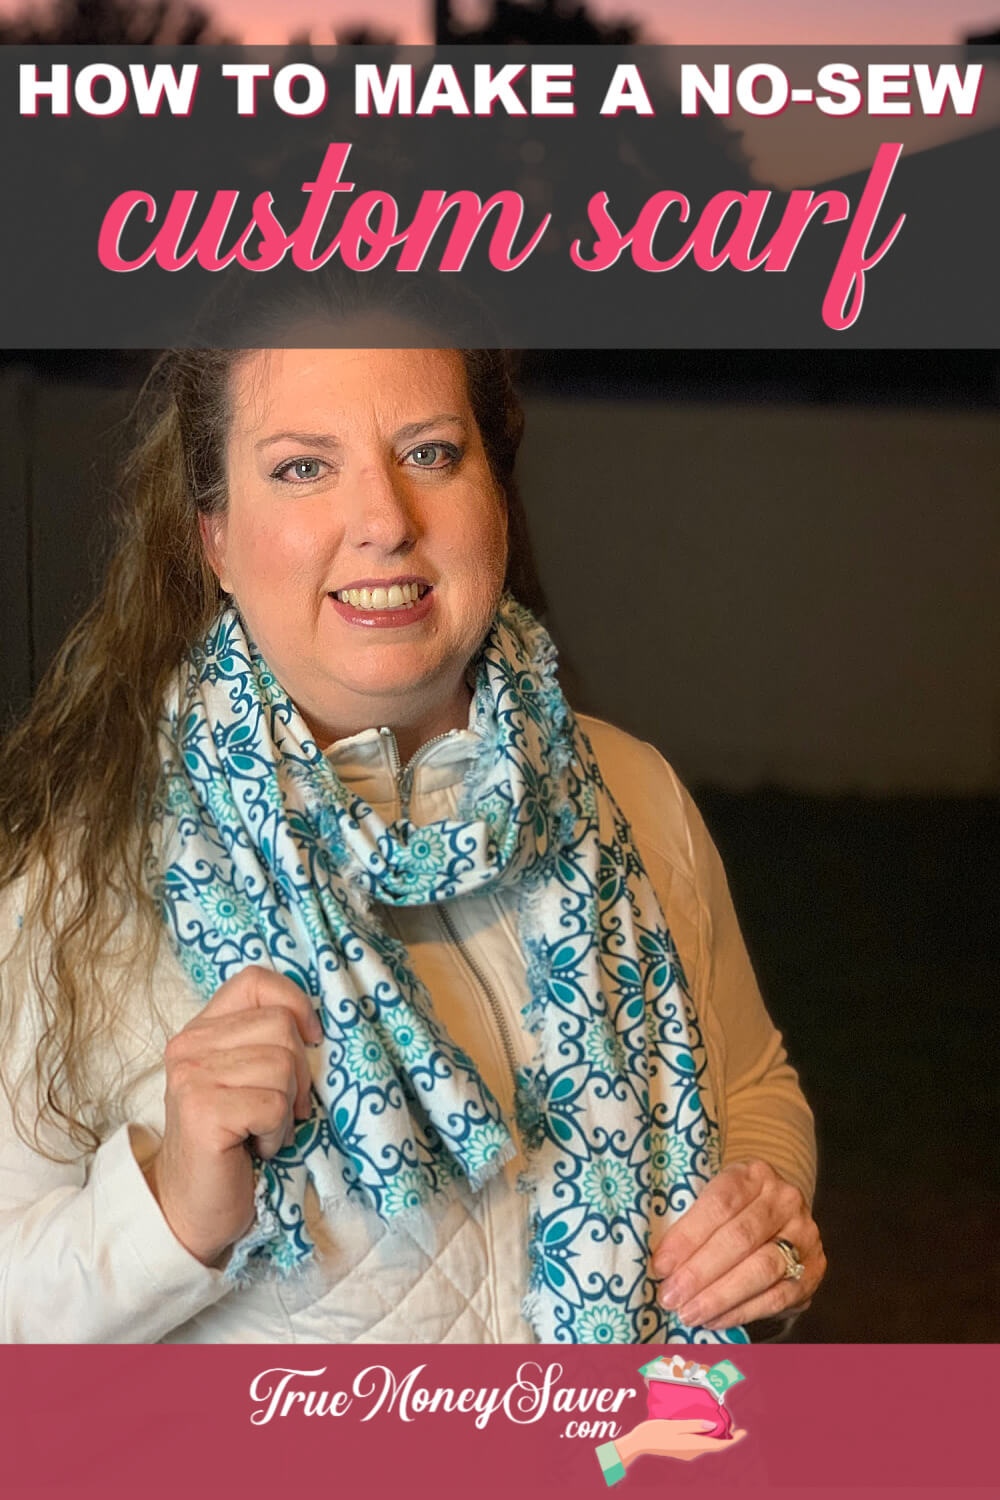
Scarves sure have come back into style as not only something to keep you warm and cozy, but as a great fashion piece too.
From infinity to blanket scarves, they just look so great and can be useful too. 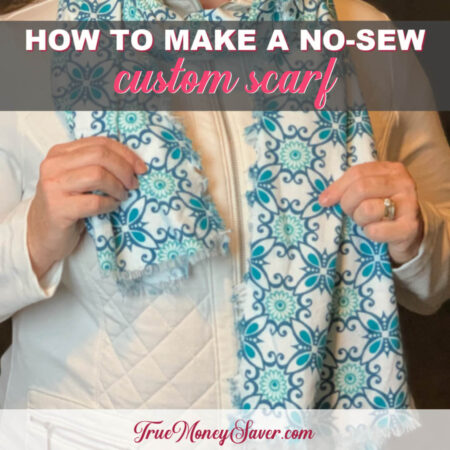
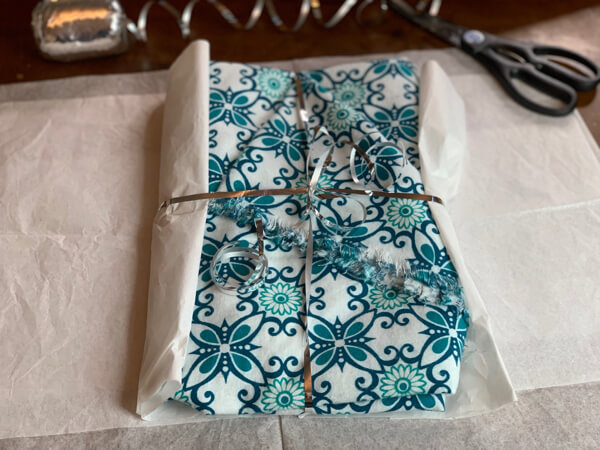
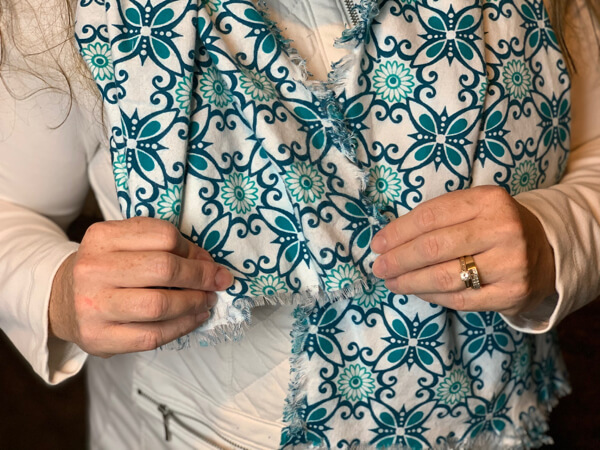
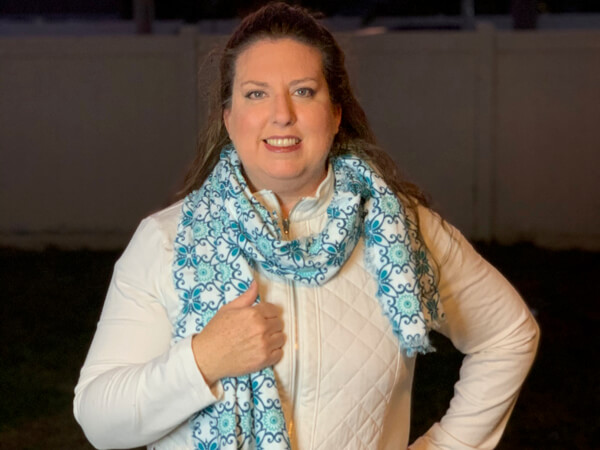
But this DIY no-sew scarf will be the best scarf out of all them! Becuase it's a no-sew easy DIY scarf that is so cheap that you can make them as great gifts for every gal you know.
And this easy DIY scarf won't take you long to make at all! In less than it takes you to watch your favorite movie, you can have one made and ready to go!
This post is part of our 30 Days of Homemade Gifts Series. 30 gifts that are easy (and cheap) to make, but also something you’ll be proud to give.
Each Homemade Gift has to meet 5 stipulations in order to maximize your money and make it easy for a busy mom to do:
- Easy to obtain supplies – Supplies are things you might already have on hand or are easy to find at Walmart or a craft store so you can get them in the same day you want to make it.
- Easy to make – Supplies are easy to work with or use so that anyone could do it… not caustic… so you could do the craft with your kids.
- Quick to make – It can be made in 30 minutes or less so it’s possible to make this gift in the middle of the night with products you most likely already have on hand. (Note: This project takes a little longer, but you can do it without even looking at the scarf. Or you can have your kids help like I did to make it in less time.)
- Cheap to make – You should be able to make the project without spending more than $10.
- Substantial – Each gift is “big” enough that you'll feel confident giving it alone and not having to add a gift card to it.
BONUSES:
Multiple uses – Multiple gifts can be made out of the same supplies giving you options to use up all the supplies you buy.
Saving Money Double Bonus: Try to think about what you already have on hand to upcycled and save more money.
So are you ready to get started making this custom scarf? Let's get busy making this DIY no-sew scarf!

Custom Scarf Supplies:
- 2 Yards Flannel Fabric (this will make 2 scarves) @ $6.99/yard (w/up to 40% Off = $8.38)
- Scissors
- Seam Ripper
- Iron
- Glitter Iron-On Letter 2″ – $.99 (optional)
Please know that this no-sew easy DIY scarf will have to be spot cleaned or hand washed.
Directions To Make Your Custom Scarf:
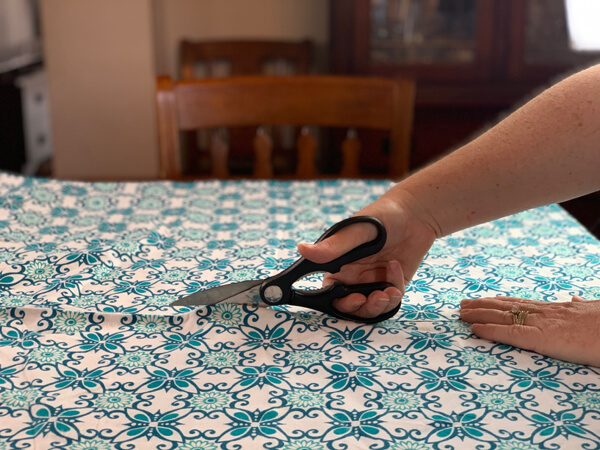
Step 1: Lay Out & Cut Fabric
Lay out your fabric on a large table. I used my dining room table for this project.
To Create A Long Scarf: (this is what I made)
If you want to create a long scarf, cut it down the middle vertically along the fold the way it was folded on the bolt. This will give you 2 long pieces of fabric.
Or Create A Square Scarf:
If you want to create a square scarf, cut it down the middle horizontally. This will give you 2 pieces of fabric also, just the other way, so they will be square.
BONUS FREE DOWNLOAD
Save Money On Your Craft Supplies
Download this FREE Guide to find 25 Ways to save money when you buy craft supplies so that your beautiful creations cost less.
Save Money On Your Craft Supplies
Download this FREE Guide to find 25 Ways to save money when you buy craft supplies so that your beautiful creations cost less.
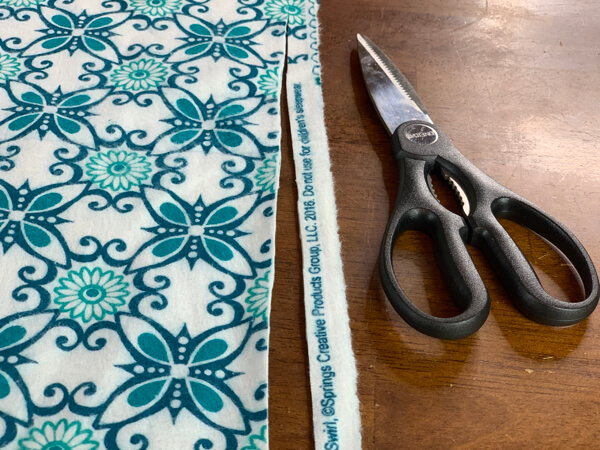
Step 2: Cut Off The Selvage
Lay your fabric out flat just like it came off the bolt.
Cut the edge off that has all the words on it, this is the selvage and it's where the fabric was attached to the machine where it was printed.
You don't want your custom scarf to have the store's name where you bought it on the side, so you've gotta cut it off right away.
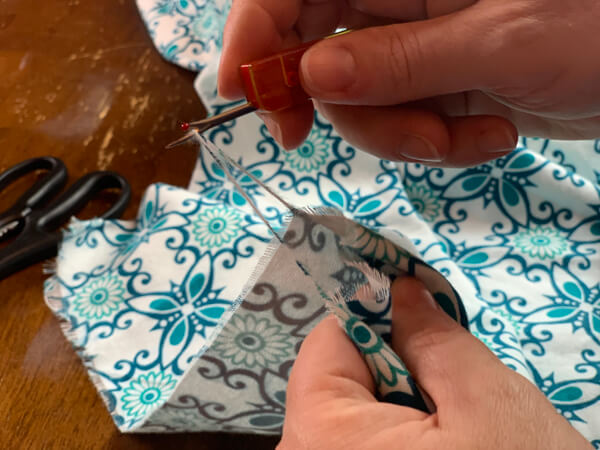
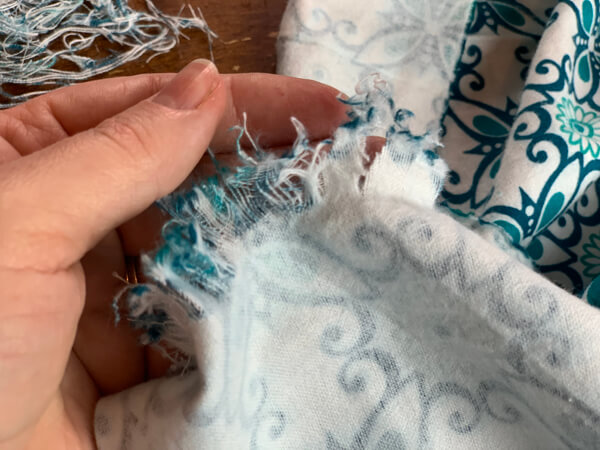
Step 3: Start To Take Apart The Threads
Starting with one end, start removing a first few layers of fabric thread with your seam ripper. Basically you are just picking a couple of pieces of thread out and pulling them apart from the other threads, leaving some cross threads behind which becomes the fringe.
You need to decide how long you want your fringe. I would start with about 1/2 inch, but you could go up to 6 inches (fyi, that would take a really long time to pull apart). You could even have the fringe one inch on the short sides and 6 inches on the long sides.
You can see on the back of the fabric how I used the seam ripper to slice through the fabric to then make it easier to pull the cross threads out of the edges to create the fringe.

So if you are working on the long sides, you will be taking out the vertical threads up to the length you want your fringe to be.
If you are working on the top or bottom sides, you will be taking out the horizontal threads up to the length you want your fringe to be.
This is really all it takes to make a DIY custom scarf… just keep pulling!
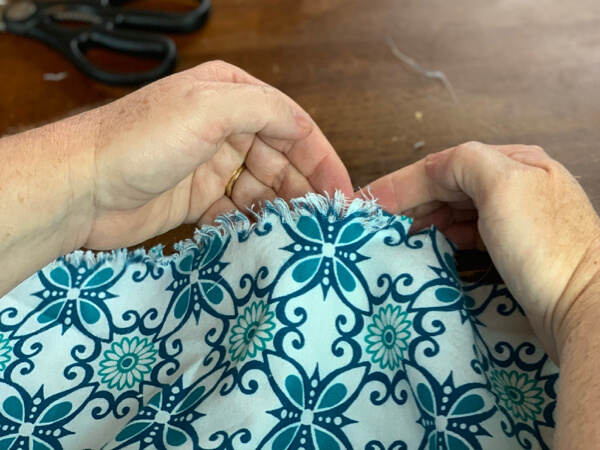
Step 4: Start To Fringe Threads
Now with your fingers, take a couple of threads and pull and twist to separate the threads. The longer you made the fringe the better it will stay together.
Repeat this process all the way around your custom scarf.
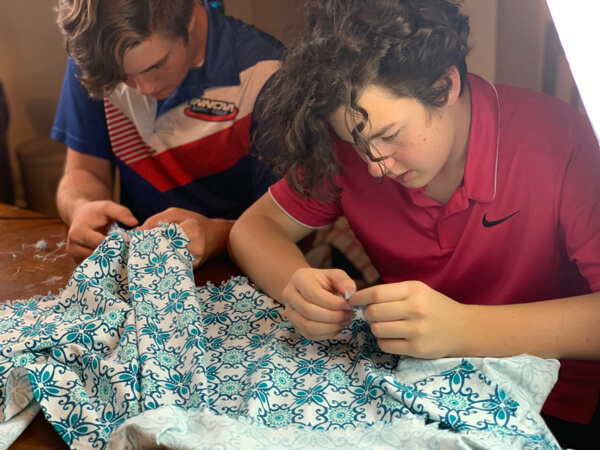
Get your helpers to pull the fringe apart with you… make it a family affair!
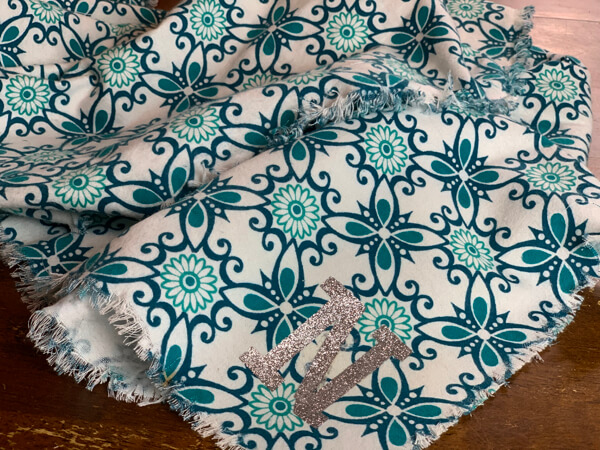
Step 5: Iron Custom Scarf Fringes & Iron-On Monogram Letter
Lay out your DIY no-sew scarf out with the completed fringes. With a warm iron, iron fringes to help them stay together.
Since this custom scarf is not sewn, it will be best for it to be hand washed or spot cleaned. You can still wash it, but I'd use a delicate wash cycle and skip using the dryer so that it doesn't pull the fringe and mess up your work.
Lay the iron-on letter where you want it and iron it onto your no-sew easy DIY scarf according to package directions.
BONUS FREE DOWNLOAD
Save Money On Your Craft Supplies
Download this FREE Guide to find 25 Ways to save money when you buy craft supplies so that your beautiful creations cost less.
Save Money On Your Craft Supplies
Download this FREE Guide to find 25 Ways to save money when you buy craft supplies so that your beautiful creations cost less.
If you're not afraid of the sewing machine, here are a couple of cute scarf variations:
Other No-Sew Ideas:
Once you see how simple (and fun) this custom scarf is to make, you're gonna want to make more no-sew projects. Here's a bunch to keep you busy for the next couple days:
- Winter Cape
- Flannel Cape
- Nursing Shawl
- Fleece Girlfriend Wrap
- Fleece Braided Scarf
- No-Sew Fleece Fashion Poncho
- Oblong Fleece Shawl
- Fleece Shawl With Fringe
Child's No-Sew Ideas:
What Does A DIY Custom Scarf Cost?
- 2 Yards Flannel Fabric – $6.99/yard (after 40% Off coupon = $8.38)
- Scissors – $0
- Seam Ripper – $0
- Iron – $0
- Glitter Iron-On Letter 2″ – 99¢ (optional)
Total Cost: $8.38 for (2) Scarves = $4.19 each Scarf!
As Much As: $10.36 for (2) Scarves & (2) Iron-On Letters = $5.18 each Scarf!
So as you can see this DIY no-sew scarf is so cheap and you can make them into great gifts this year!
This easy DIY scarf won’t take you long to make at all! Since you'll be watching lots of holiday movies this time of year, you'll be surprised at how many you can make!
And I know you’ll love this no-sew scarf, be sure to make a couple for you too because they are so easy to make!
YOUR TURN: Who are you going to make a custom scarf for this year? Share your DIY pictures in the comments below!