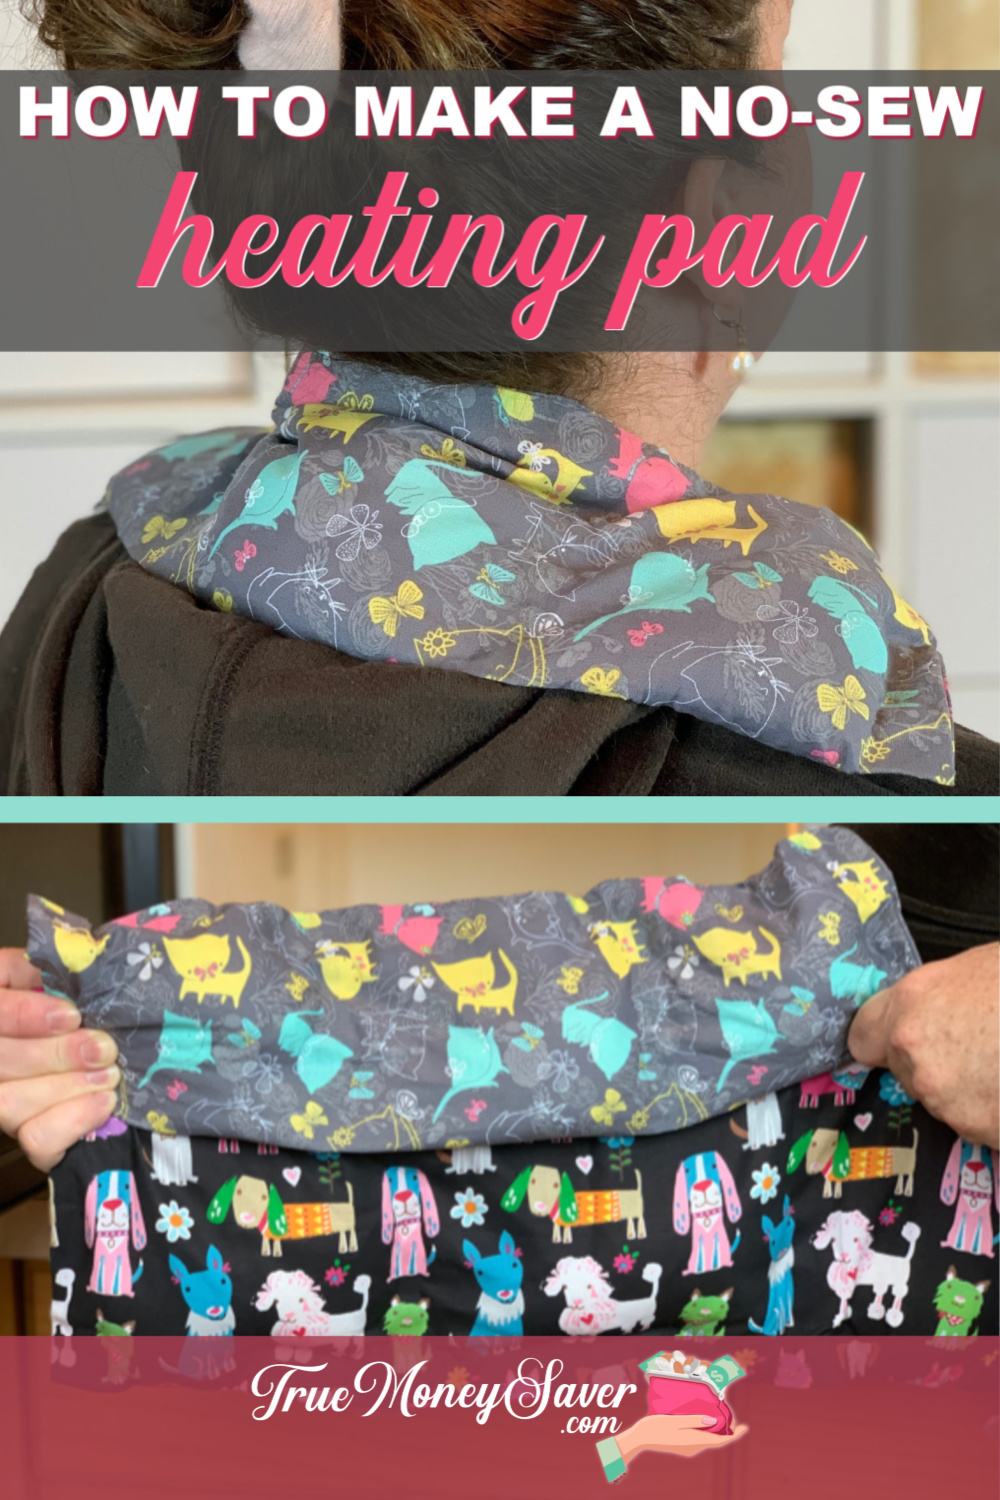
Besides one that works, one that is handmade, of course!
I still have several my grandmother made me a long time ago. Not only do they still work great, but they are a great memory of my lovely grandmother each time I use them. 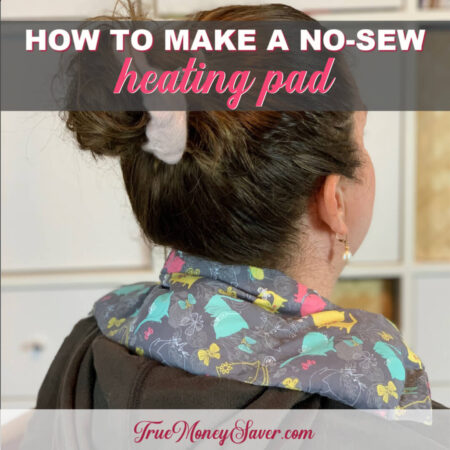
Since we all have aches and pains, having a heating pad on hand is important for young families. Plus they are super safe for kids to use instead of using an electric heating pad. Sometimes my kids bring one to bed with them to heal an achy arm or leg after a long day of sporting activities.
And did you know these can also be used as ice packs too? Sure can! (Just throw them in a baggie inside the freezer for 4 hours and they'll be ready for any bump or bruise.)
Every time I pull out the ones my grandmother made, I think of how she lovingly created them for me. While her's are sewn, I've found an even easier way to create these no-sew heat pads without using a sewing machine.
I've been making these no-sew heat pads for years to use with my kids, so now it's time for you learn how to make a no-sew heating pad too.
You'll be surprised at how simple these no-sew heating pads are to make (the hardest part is being patient during the drying time).
Wait till you hear the price… would you be surprised that you can make two of them for under $5? You can!
Plus, these no-sew DIY heat pads are so easy to make that you can get the family involved to help you, creating quality family crafting time.
The best heating pad is one that is made with love (and also essential oils). My no-sew heat pads contain essential oils so that they smell great, and also have aromatherapy properties as well. That's like a double bonus in my book!
This post is part of our 30 Days of Homemade Gifts Series. 30 gifts that are easy (and cheap) to make, but also something you’ll be proud to give.
Each Homemade Gift has to meet 5 stipulations in order to maximize your money and make it easy for a busy mom to do:
- Easy to obtain supplies – Supplies are things you might already have on hand or are easy to find at Walmart or a craft store so you can get them in the same day you want to make it.
- Easy to make – Supplies are easy to work with or use so that anyone could do it… not caustic… so you could do the craft with your kids.
- Quick to make – It can be made in 30 minutes or less so it’s possible to make this gift in the middle of the night with products you most likely already have on hand. (Note: The 30 minute guide is your “hands on” time, dry time is excluded.)
- Cheap to make – You should be able to make the project without spending more than $10.
- Substantial – Each gift is “big” enough that you'll feel confident giving it alone and not having to add a gift card to it.
BONUSES:
Multiple uses – Multiple gifts can be made out of the same supplies giving you options to use up all the supplies you buy.
Saving Money Double Bonus: Try to think about what you already have on hand to upcycled and save more money.
Are you excited to learn how to make these DIY heat pads? Let's get started!
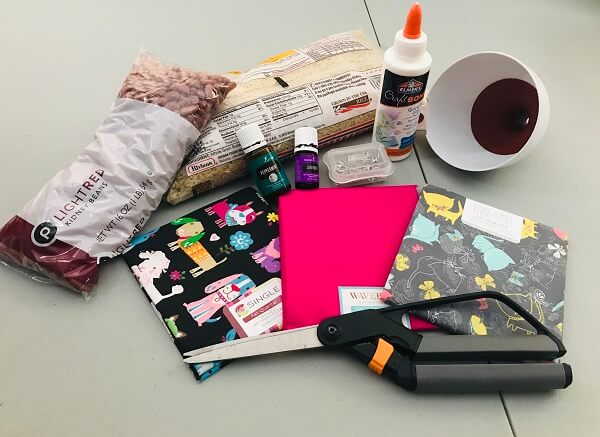
Supplies:
- (1) Fat Quarter Fabric piece, or, you can buy two in coordinating colors
Here are the three I chose: Waverly Inspirations Cotton 18″ x 21″ Fat Quarter Magenta Fabric – $.97
Creative Cuts Cotton 18″ X 21″ Fat Quarter Puppy Black Fabric, 1 Each – $.97
Cotton Fat Quarter Pre-Cut Kitten Meow Fabric, per Yard – $.97 - Fabric Glue such as Elmer's Craft Bond Quick Dry Glue ($2.47 @ Walmart)
- Up to 3 Cups Long Grain Rice (not instant) – OR you can use beans, barley, wheat or even millet
- 10 Drops Peppermint OR Lavender Essential Oil per cup of rice (I use the Young Living brand because of their purity promise)
- Sharp Scissors or Rotary Cutter and Self-Healing Mat
- Ruler or measuring tape
- Sewing Pins
- Funnel
- Iron/Steamer
- Wax Paper
- Wet Paper Towel (to wipe glue from fingers)
Cutting Notes:
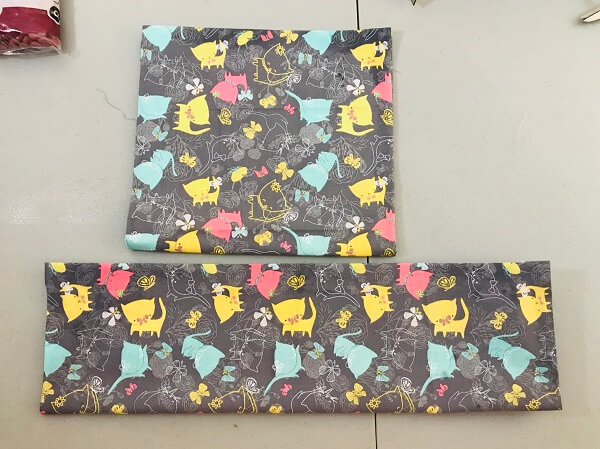
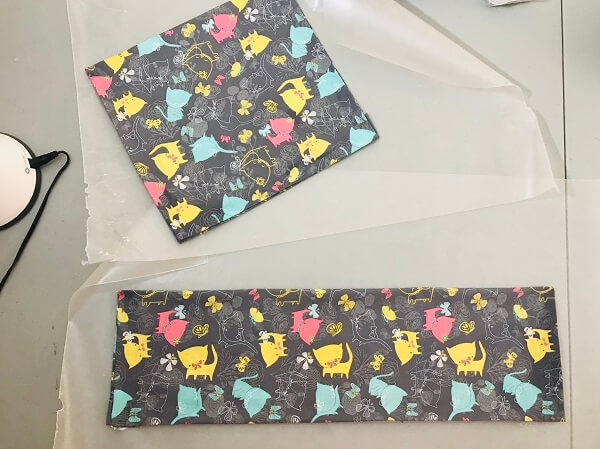
You can make one large heating pad out of one fat quarter piece of fabric by folding it in half. Or you can cut the fat quarter in half and get two smaller ones out of it.
The great thing about cutting a fat quarter in half is that you'll get one long heating pad which is great for your neck as well as a smaller square heating pad that is perfect for places like your ankle.
BONUS FREE DOWNLOAD
Save Money On Your Craft Supplies
Download this FREE Guide to find 25 Ways to save money when you buy craft supplies so that your beautiful creations cost less.
Save Money On Your Craft Supplies
Download this FREE Guide to find 25 Ways to save money when you buy craft supplies so that your beautiful creations cost less.
Directions:
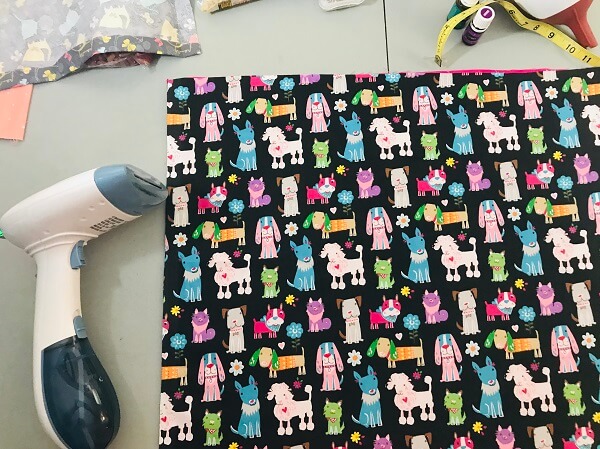
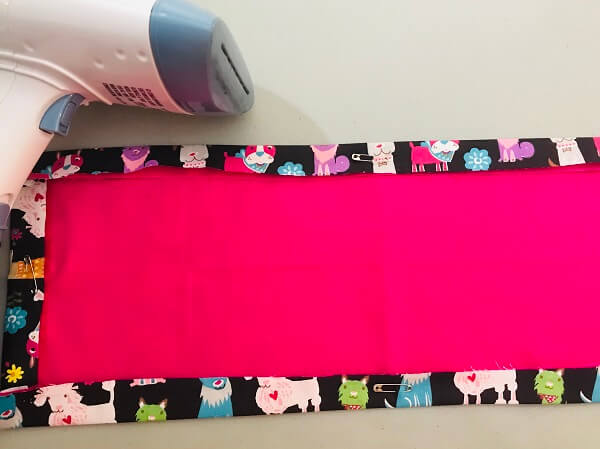
Step 1: Iron Fabric Flat
Iron or steam all fabric pieces flat.
This will make the fabric easier to work with as well as helping the finished product look crisp.
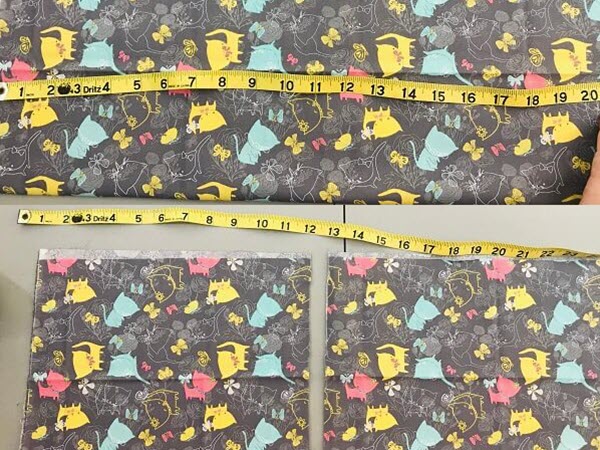
Step 2: Measure & Cut
Take the one fat quarter piece, measure and cut in half.
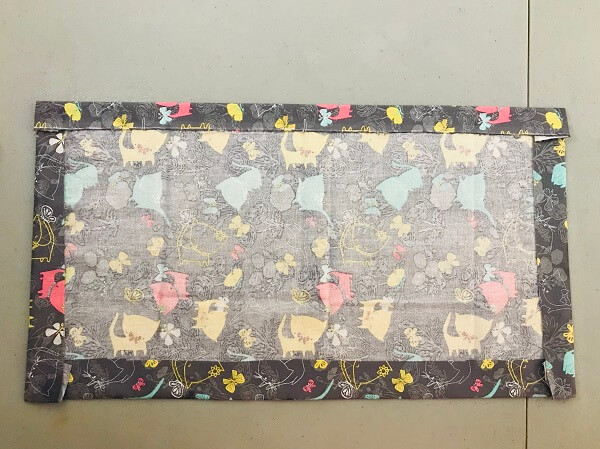
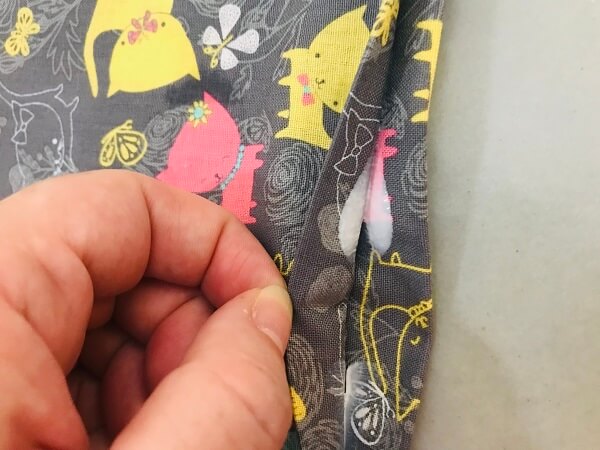
Step 3: Iron & Create Seams
Fold the fabric edges in 1″ to create a seam.
Do this around each edge of the fabric.
Make sure you steam or iron the corners really good.
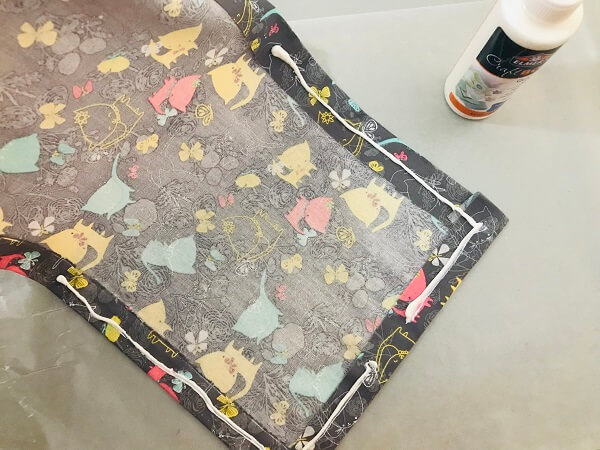
Step 4: Gluing The Heating Pad Segments
Fold the fabric back in half, and run a bead of glue in between the fabric seams on all three sides.
Make sure you glue each corner well.
Run your fingers over the fabric where the glue is to press the glue into the fabric.
You may want to lay a piece of wax paper under your fabric to catch any glue that may squeeze out. Keep a wet paper towel handy to wipe your fingers.
Make sure to leave an inch of fabric unglued so you can add your rice inside once the glue is dry.
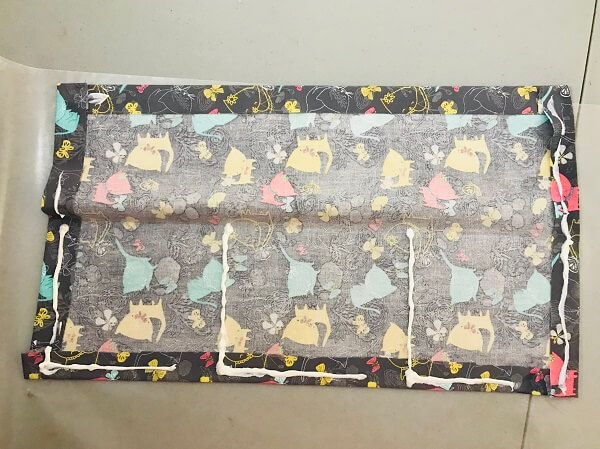
Step 5: Glue Sections
You'll want to glue separate sections to keep the rice from shifting when you are using your heating pad.
Figure out where you would split the fabric in half or thirds to separate the rice. Run a bead of glue down the sections to create inner pockets making sure to glue all the way to the fold in the fabric.
Then run a bead of glue on the outside seams – making sure – to leave an inch for each pocket so you can add the rice once the glue is dry. Glue the corners well.
Note: If you plan on using something bigger than rice like beans, you will want to leave a larger hole so that it is easier to pour those beans inside the pockets.
Step 6: Let Dry
Once you have finished gluing all your heating pads, the glue needs time to dry.
Although this glue says it dries in 5 minutes, I would wait several hours before adding the rice. This is a good project to do right before bed and then let it dry really hard overnight.
BONUS FREE DOWNLOAD
Save Money On Your Craft Supplies
Download this FREE Guide to find 25 Ways to save money when you buy craft supplies so that your beautiful creations cost less.
Save Money On Your Craft Supplies
Download this FREE Guide to find 25 Ways to save money when you buy craft supplies so that your beautiful creations cost less.
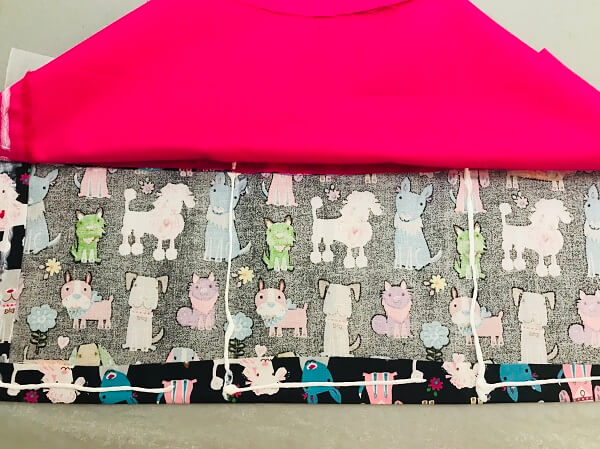
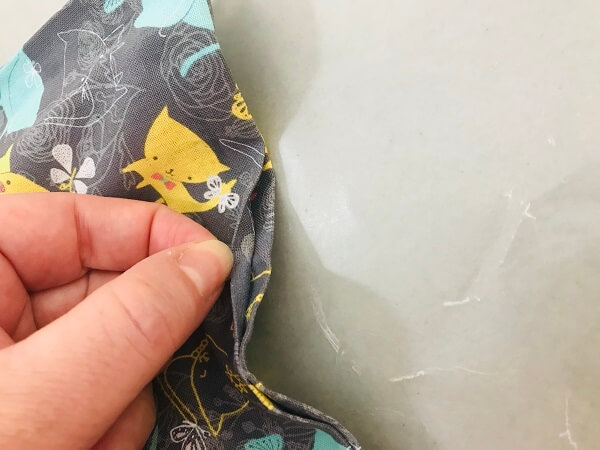
Step 7: Coordinating Fabrics – Pin, Steam & Create Seams
Because these fabrics are not exactly square or the exact length, you'll want to go one step further so that your edges meet neatly when you go to glue.
First, lay the patterned fabric face down (patterned side down), then lay the good side of the solid fabric down on top of the patterned fabric (so both good sides are facing down).
Fold each edge in one inch and pin, this is just to hold the fabric while steaming or ironing.
Create your seam by ironing or steaming flat, making sure to get the corners good.
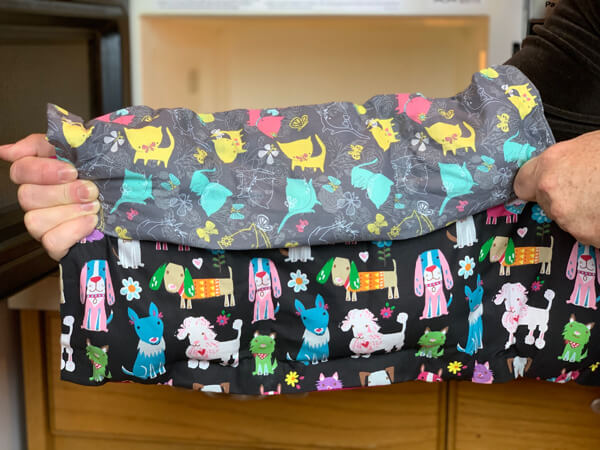
Step 8: Coordinating Fabrics – Pin & Glue
Unpin the fabric and take the solid fabric out and flip it over, putting the solid color fabric seam against the seam of the patterned fabric.
I added 3 pins on one side to help it stay together while I glued it.
Follow the instructions to glue the heating pads together from Step 4 & 5.
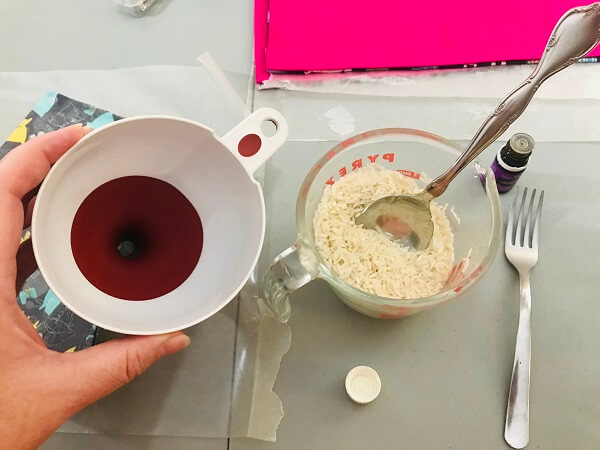
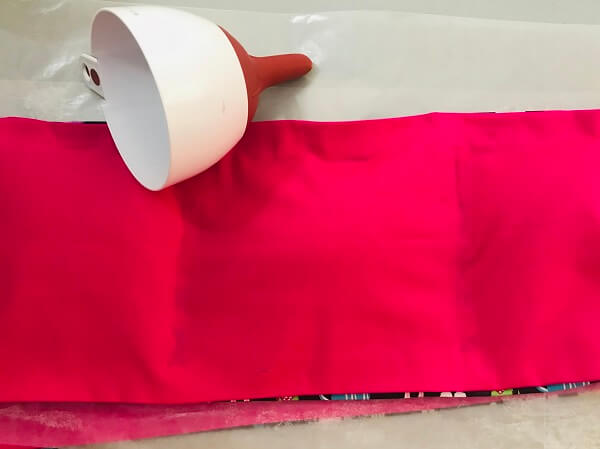
Step 9: Add Rice & Essential Oils
Once the glue has dried, you will need to add your rice.
In a bowl combine the rice and essential oils, mixing well.
Then, use a funnel to add the essential oil infused rice to the section of the heating pad.
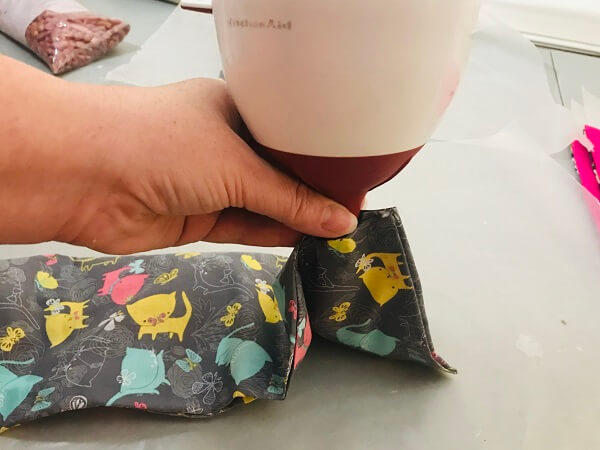
The other half that was folded longways, I used 1/2 cup of rice in each pocket.
I used 1 cup of rice in each pocket and then glued those pockets shut.
Step 10: Glue Your Heating Pad Closed
Lay the bag down, and add glue to the opening, pinching the side closed so the glue holds.
Let dry for up to another 4 hours.
No-Sew Other Gift Ideas:
Heating packs aren't the only thing you can make without using traditional needle and thread to sew.
These are other great ideas:
BONUS FREE DOWNLOAD
Save Money On Your Craft Supplies
Download this FREE Guide to find 25 Ways to save money when you buy craft supplies so that your beautiful creations cost less.
Save Money On Your Craft Supplies
Download this FREE Guide to find 25 Ways to save money when you buy craft supplies so that your beautiful creations cost less.
Best Heating Pad Total Cost:
- (1) Fat Quarter Fabric piece – 97¢ (You might want to buy two in coordinating colors)
Here are the three I chose: Waverly Inspirations Cotton 18″ x 21″ Fat Quarter Magenta Fabric – 97¢
Creative Cuts Cotton 18″ X 21″ Fat Quarter Puppy Black Fabric, 1 Each – 97¢
Cotton Fat Quarter Pre-Cut Kitten Meow Fabric, per Yard – 97¢ - Fabric Glue such as Elmer's Craft Bond Quick Dry Glue, 4 Fl. Oz. – $2.47
- 3 Cups Long Grain Rice (not instant) 20 lb bag – $8.43 (21¢/cup = 63¢ each heating pad)
OR, you can use beans, barley, wheat or even millet - 10 Drops Peppermint OR Lavender Essential Oil per cup of rice (I use the Young Living brand because of their purity promise)
- Sharp Scissors – $0
- Ruler or measuring tape – $0
- Pins – $0
- Funnel – $0
- Iron/Steamer – $0
- Wax Paper – $0
Total Cost: $3.44 for one large heating pad or $1.72 each for two smaller heating pads = fabric & rice
(Or could be FREE if you have some fabric on hand, rice and fabric glue!)
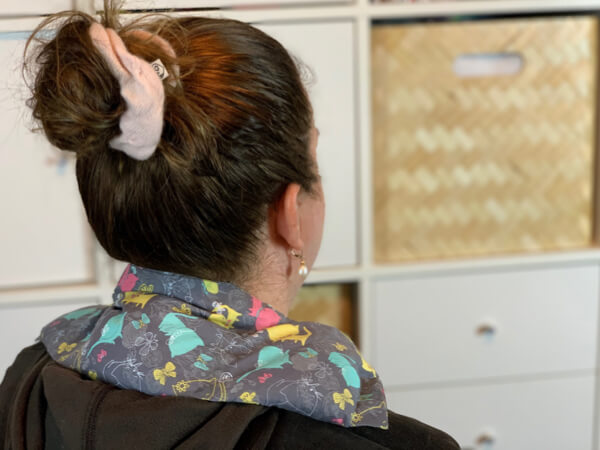
So as you can see, these no-sew best heating pads are so simple to make. If you can cut and glue, you can make these no-sew heat pads!
Plus, since they are under $5 to make, you can make them for everyone on your gift list this year!
And with the addition of essential oils, your family and friends will love the aromatherapy properties on these DIY heat pads gifts.
Since your family can help with this project, it will always be great family time well spent.
YOUR TURN: Who are you going to give this no-sew best heating pad to? Let me know in the comments below!