Since so many people wear earrings, that makes them an easy gift to give.
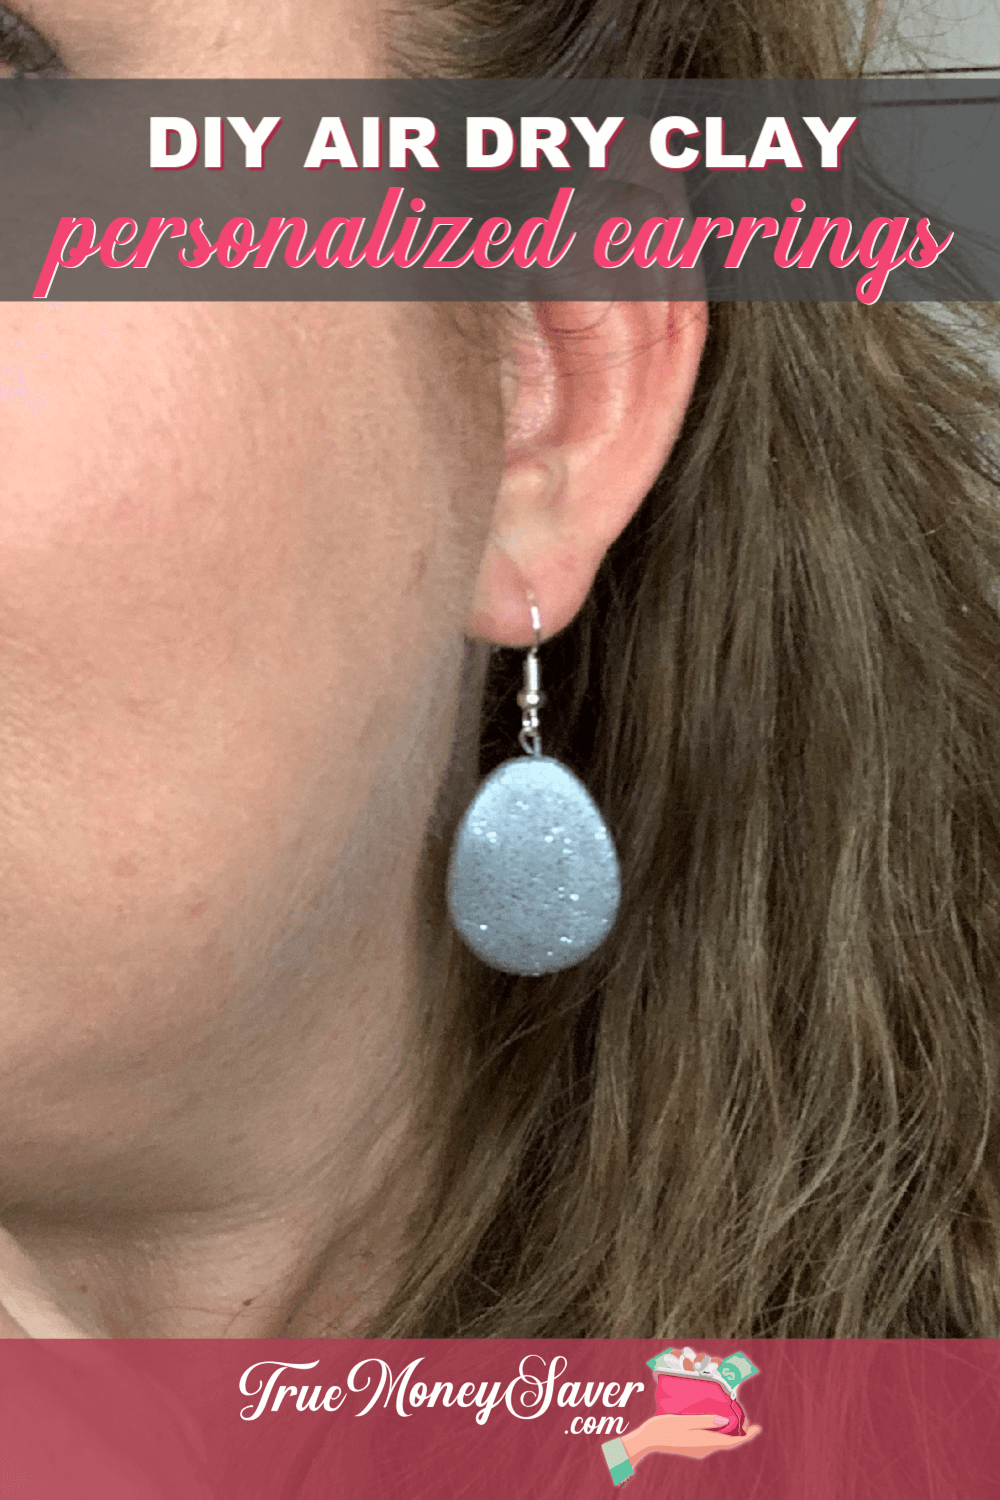
But no one wants just plain earrings. That's why I'm going to teach you how to make earrings out of air dry clay with this step by step tutorial! 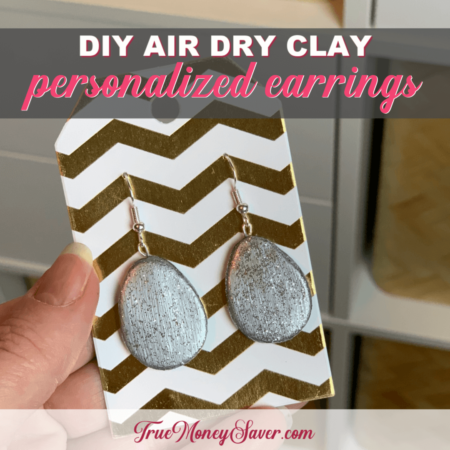
These DIY air dry clay jewelry earrings are so much fun to make. They remind you of the young kindergarten days of playing with play doh, except they are so pretty when you are done, (and lightweight) you'll want to wear them every day.
And these air dry clay handmade jewelry earrings will be so special because they are handmade by you. Eveyone loves unique and handmade gifts. Especially the person who has everything, like a mother or grandmother.
Let me tell you how inexpensive they cost too…we're talking a pair cost less than a gumball, inexpensive! I'm not kidding!
And while the drying time takes the longest part of this project, you'll be surprised at how many dozens of pairs you can whip up easily in a couple of hours.
You'll be creating a treasured piece of jewelry that will last for years to come.
This post is part of our 30 Days of Homemade Gifts Series. 30 gifts that are easy (and cheap) to make, but also something you’ll be proud to give.
Each Homemade Gift has to meet 5 stipulations in order to maximize your money and make it easy for a busy mom to do:
- Easy to obtain supplies – Supplies are things you might already have on hand or are easy to find at Walmart or a craft store so you can get them in the same day you want to make it.
- Easy to make – Supplies are easy to work with or use so that anyone could do it… not caustic… so you could do the craft with your kids.
- Quick to make – It can be made in 30 minutes or less so it’s possible to make this gift in the middle of the night with products you most likely already have on hand. (Note: The 30 minute guide is your “hands on” time, dry time is excluded.)
- Cheap to make – You should be able to make the project without spending more than $10.
- Substantial – Each gift is “big” enough that you'll feel confident giving it alone and not having to add a gift card to it.
BONUSES:
Multiple uses – Multiple gifts can be made out of the same supplies giving you options to use up all the supplies you buy.
Saving Money Double Bonus: Try to think about what you already have on hand to upcycled and save more money.
So are you ready to learn how to make soem adorable earrings? Let's get learning with this step by step tutorial!
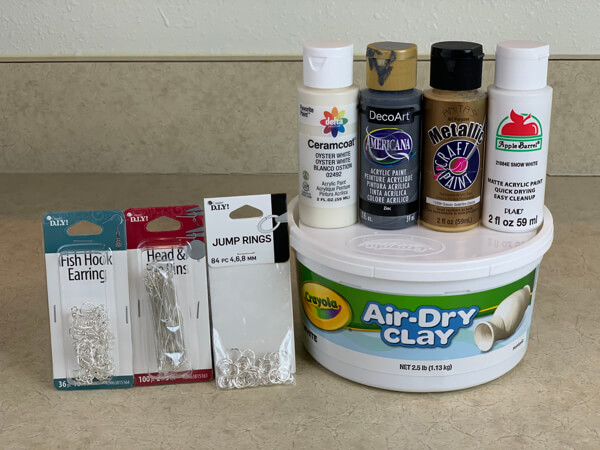
Supplies To Learn How To Make Earrings:
- White Crayola Air-Dry Clay 2.5 lb – $6.49 (@ Walmart)
- Fish Hook Dangle Earrings – $3.23 (@ Walmart)
- Eye Pins / Head Pins / Ball Head Pins Findings for Earring Pendant – $3.23 (@ Walmart)
- Paint – As Low As 50¢ each (@ Walmart)
- Modge Podge 8 oz – $6.99 (@ Walmart)
- Paint Brush – 4-pack $1 (@ Dollar Tree)
- Cardstock or Gift Tags (for presentation) – $.49 (@ Craft Store)
If want to make stud earrings instead of dangles, you'll need these additional suppilies
- Flat Pad Earring Posts With Clutch 8 mm 60 ct – $2.99 (50% Off @ Hobby Lobby) = $1.50 (NOTE: I could not find these at Walmart, so you'd want to go to a craft store to get them)
- E-6000 Glue 2 oz – $4.99
Hobby Lobby has some great stamps are perfect for your handmade jewelry gift tags:
BONUS FREE DOWNLOAD
Save Money On Your Craft Supplies
Download this FREE Guide to find 25 Ways to save money when you buy craft supplies so that your beautiful creations cost less.
Save Money On Your Craft Supplies
Download this FREE Guide to find 25 Ways to save money when you buy craft supplies so that your beautiful creations cost less.
How To Make Earrings Directions:
Step 1: Divide Out The Clay
An easy way to begin is to find some earrings you already have that are the same size you want to make, that way you have a guide and don't have to work from memory.
Open your air dry clay and pinch off a small piece
Even while you're working, put the rest into a Ziploc plastic baggy so that it does not dry out. It should fit back into the box, even if it's inside the plastic container.
DIY air dry clay jewelry is very easy to work with as long as the clay does not dry out.

Step 2: Form Clay
Start by rolling a small pinch around in a ball, and then with the clay in between your fingers, squish the clay to form a round circle. You'll want to make sure that your final clay shape is thicker than 1/4″ for durability.
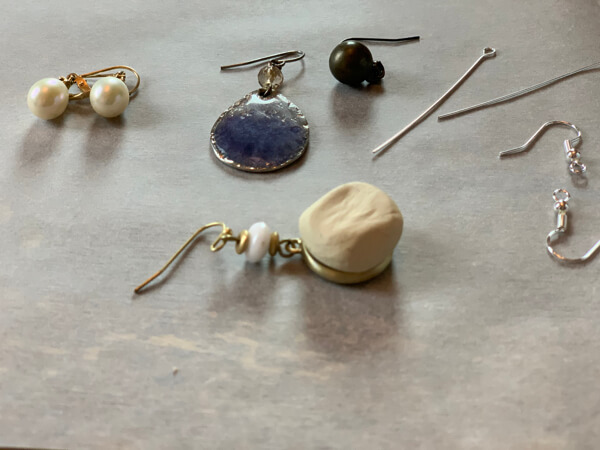
I started by making round circles, then it was so much fun that I also made a pair of teardrop dangles.
The hardest part is letting go of the perfectionism that they need to be exactly the same size. They aren't going to be because they are handmade. If you mess something up, just add a drop of water on your fingertips and wipe it on the clay. It can smooth out many imperfections.
Don't forget to use the flat pin (or eye pin) to poke a hole in your clay so that it will hang on the actual earring that is going in your ear.
Round circles and Teardrops aren't the only shapes you can make. You can make squares, triangles, ovals, etc. Use your imagination with your air dry clay handmade jewelry.
Step 3: Let Dry
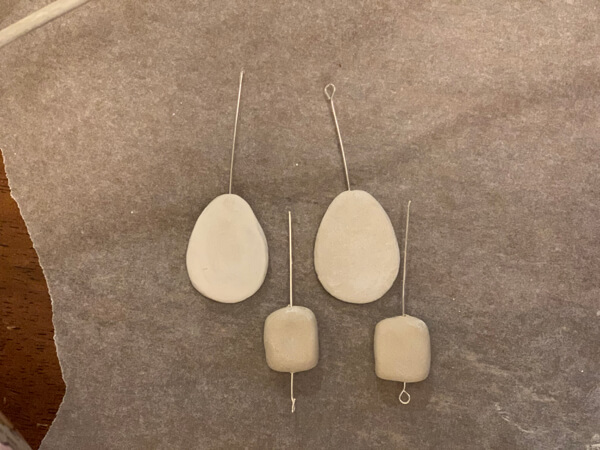
Now let the clay dry. This should take around 4 hours for these small pieces to be thoroughly dry before you can paint them.
As it's drying you'll start to see the clay turn a whiteish color as opposed to a the grey color it starts with.
See how my teardrops are whiter in color than the squares? That's because the teardrops are thinner so they will dry sooner.

Step 4: Paint
After the clay has thoroughly dried, it's time to paint.
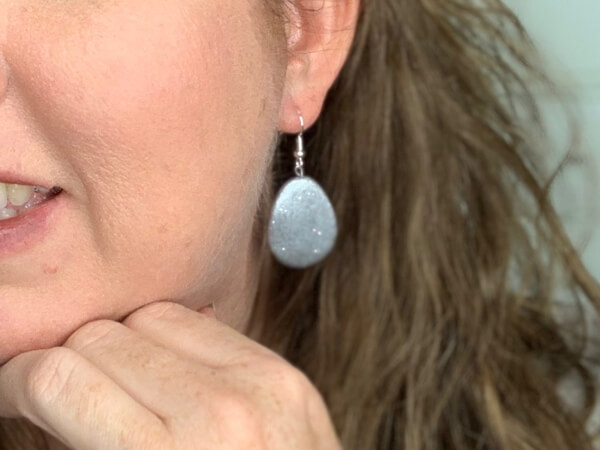
Use your imagination to the style and shapes of painting you want to do. Paint them all one color, paint half one color and the other half the next. Paint stripes, polka dots, or color block them. Just make sure you have 2 earrings the same – a matching pair! That's how to make earrings out of air dry clay!
Are you talented? You could paint flowers or other shapes with these clay earrings as your canvas. The painting possibilities are endless with DIY air dry clay jewelry.
Use glitter, gems, or even paint pens for sharp lines between the paint colors. Have fun with your air dry clay handmade jewelry!
Then, let it dry again. (or use a hair dryer to speed up the process)
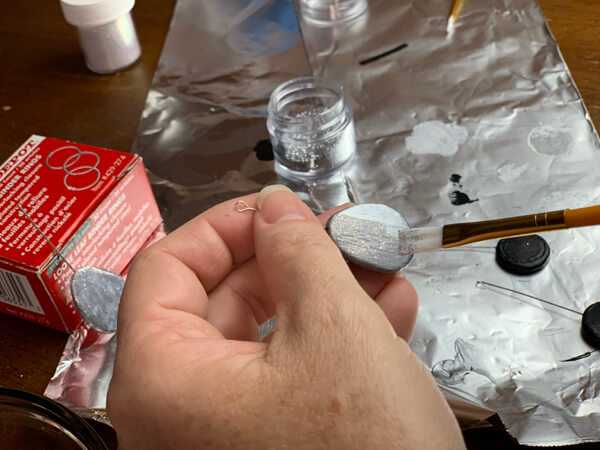
Step 5: Seal The Clay
Since the clay is still porous, you'll want to seal the clay so they are super strong and will last. This is how to make earrings a keepsake that'll last a little longer than junky jewelry on the market today.
To add glitter to my earrings, I slighly watered down my mod podge and then added glitter to it. Then I used my paintbrush to mix them together and brush over the earrings.
That gave them protection and sparkle all in one step!
If you only used paint to decorate, then you'll want to add a top coat of Modge Podge and let the air dry clay handmade jewelry dry. There are several differences with the types of Modge Podge. There is stain, sparkle, matte, and gloss. Make sure you get the one you want for the type of finish you want to achieve.
Let the sealer dry before adding your final earring (post or hook).
We are almost done with this step-by-step air dry clay tutorial!
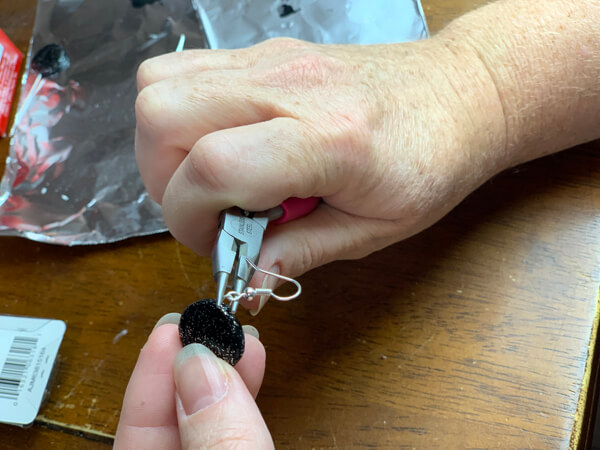
Step 6: Attach The Earring
Once the sealer has dried, use some jewerly tools to twist the head pin into a circle to fit on the fish hook earring, (if you were making stud earrings, you'd use a little drop of E-6000.)
That's it, you're done! Time to try them on, yay!

Step 7: Presentation
So what are you going to do with these earrings once you're done? How to make earrings studs look great is to present them on a card like the earrings you find in the stores, of course!
Decide how many earrings you want to give at once, and cut a card stock shape to accommodate that number.
You could also dig through your Christmas Tags and see if you have a pretty shiny one that will accomodate your pair. (That's what I did.)
Poke a push pin through the card stock to make a hole for the earring to hang on the card stock. Match up your pairs and display them together on the cards stock.
Package your air dry clay handmade jewelry in a little sheer bag.
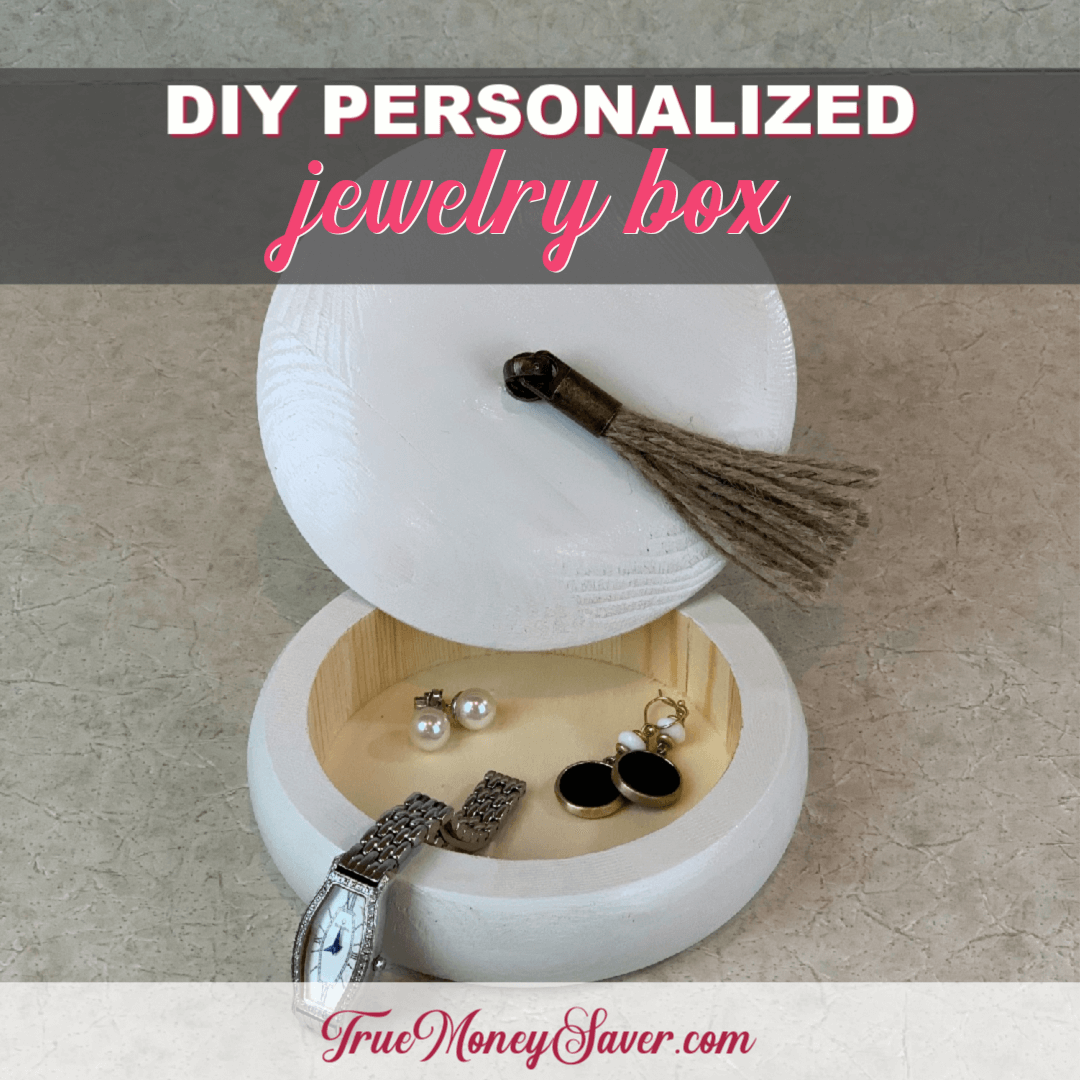
You could even present them in this beautiful Personalized Jewelry Box that cost just about $5 to make (a BONUS post as part of the Homemade Christmas)!
More Fun Gifts To Make With Air Dry Clay:
There are SO many fun things to make using air dry clay. Here are a few to get you excited:
- Diffuser Necklace
- DIY Geometric Clay Place Card Holders
- Clay Cactus Ring Holder
- DIY Plant Pockets
- DIY Graphic Napkin Rings
- Air Plant Pots
- Lacey Clay Containers
- Incense Holder
- DIY Faceted Clay Tea Light Holders
- DIY Tea Bag Holders
- Candle Holder House
- Geometric Colored Pencil Holder
- DIY Clay Heart Bunting
- Jewelry Cone
- Clay Ghost Tea Lights
- DIY Marbled Clay Standing Clock
- Stamped Clay Bracelet
BONUS FREE DOWNLOAD
Save Money On Your Craft Supplies
Download this FREE Guide to find 25 Ways to save money when you buy craft supplies so that your beautiful creations cost less.
Save Money On Your Craft Supplies
Download this FREE Guide to find 25 Ways to save money when you buy craft supplies so that your beautiful creations cost less.
How Much Does It Cost?
- White Crayola Air-Dry Clay 2.5 lb – $6.99 (40% Off using coupon @ Hobby Lobby) = $4.20 (@ about 1/5th of an oz = approximately 4¢ per pair)
- Fish Hook Dangle Earrings – $3.23 (@ Walmart) = 36 ct = 9¢ each (18¢ per pair)
- Eye Pins / Head Pins / Ball Head Pins Findings for Earring Pendant – $3.23 (@ Walmart) = 100 ct = 3¢ each (6¢ per pair)
- Paint – 50¢ each (@ Walmart)
- Modge Podge 8 oz – $6.99 (@ Walmart)
- Paint Brush – 4-pack $1 (@ Dollar Tree)
- Cardstock (for presentation) – 49¢ (@ Craft Store)
Total Cost: As low as 28¢ per pair of earrings (clay, fish hook dangle & eye pin)
Packaged them with this jewelry Box and you'll only spend around $6 for the box and 4 pairs of earrings. Wow!
As Much As: $24.44 if you had to buy everything (clay, glue, posts, paint, Modge Podge, card stock, stamp, ink pad)
So as you can see, these DIY air dry clay jewelry earrings are about the cost of a gumball! You can't go wrong with that price as well as the thoughtfulness that is behind them.
You’ll be surprised at how many dozens of pairs you can whip up easily in a couple of hours (minus the drying time). So easy to do and make! I love that!
A unique gift is always treasured more than any others.
YOUR TURN: Do you think learning how to make earrings was easy? What do you think you will make next? Let me know in the comments below!