Believe it or not, but the Sunshine State where I live has a LOT of rain. It never fails that I head somewhere with my tote bag full of either library books or snacks and I need to sit it down and it gets all soaken wet.
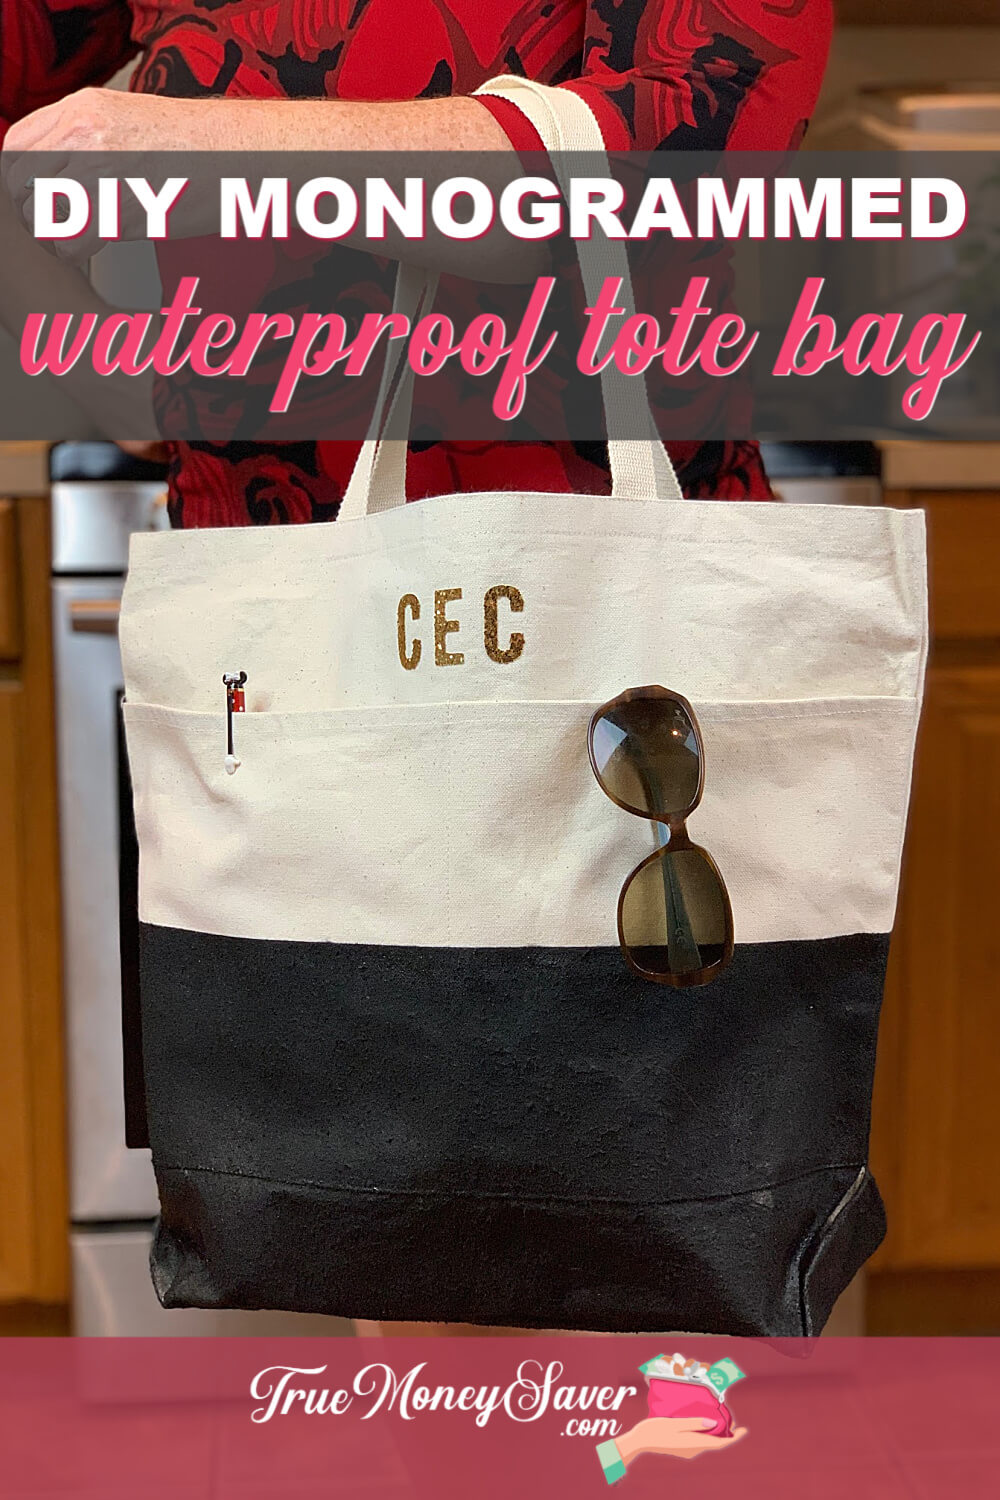
That's when it hit me! I can make a DIY waterproof tote bag that will help keep my things dry even if I get soaked! 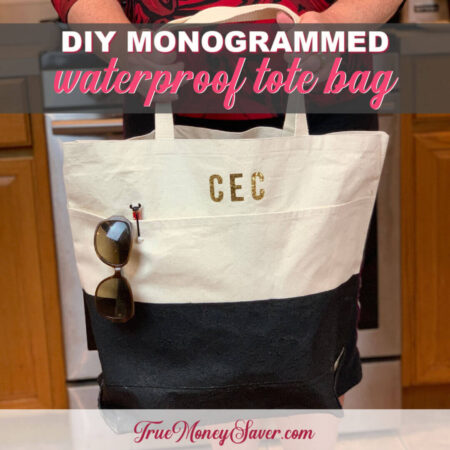
So I started searching for something and I found it late one night on an infomercial – Plasti Dip Spray Paint. It's a spray paint that adds a rubber-like coating on the outside of your tote bag to give it a perfect barrier to moisture so your things don't get wet. Yay!
If you have ever used spray paint before, you'll easily be able to do this project!
Your friends and family are going to love this gift too! Because who doesn't love a good looking tote bag? I know I have several that I use all the time because they are just so functional for holding all my treasures.
Plus, I've got some great monogrammed tote bag ideas to make this bag extra special!
And this DIY canvas tote bag project is very affordable too. Because simple and frugal are two of my favorite words.
This post is part of our 30 Days of Homemade Gifts Series. 30 gifts that are easy (and cheap) to make, but also something you’ll be proud to give.
Each Homemade Gift has to meet 5 stipulations in order to maximize your money and make it easy for a busy mom to do:
- Easy to obtain supplies – Supplies are things you might already have on hand or are easy to find at Walmart or a craft store so you can get them in the same day you want to make it.
- Easy to make – Supplies are easy to work with or use so that anyone could do it… not caustic… so you could do the craft with your kids.
- Quick to make – It can be made in 30 minutes or less so it’s possible to make this gift in the middle of the night with products most likely already have on hand. (Note: It takes extra dry time and baking time for this project.)
- Cheap to make – You should be able to make the project without spending more than $10.
- Substantial – Each gift is “big” enough that you'll feel confident giving it alone and not having to add a gift card to it.
BONUSES:
Multiple uses – Multiple gifts can be made out of the same supplies giving you options to use up all the supplies you buy.
Saving Money Double Bonus: Try to think about what you already have on hand to upcycled and save more money.
Are you ready to learn how to make this DIY waterproof tote bag? Let's get to it!
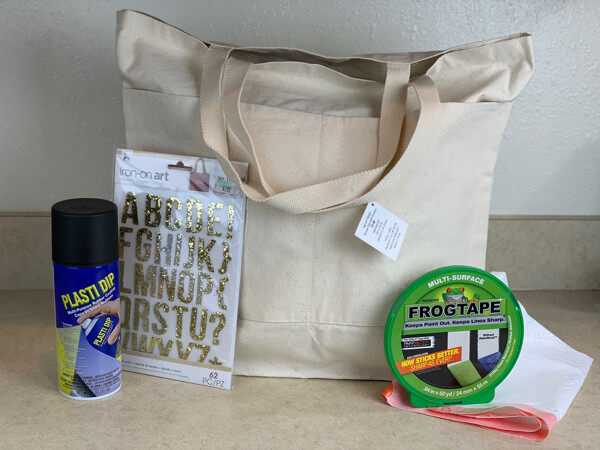
DIY Waterproof Tote Bag Supplies:
- Large Natural Canvas Tote Bag With Pockets – $3.49 (@ Hobby Lobby)
- Plasti Dip Spray Paint – $4.96 (@ Walmart – can be found at hardware stores too)
- Iron-On Monogramm Letters – prices for individual letters start at 89¢ (@ Hobby Lobby)
- Painters Tape
- Trash Bag (or something to cover the part of the bag you are NOT painting)
- Iron
- Ruler
Optional Supplies, if you want to make a closure for your bag:
- Ribbon
- Fabric Fuse Tape
- Velcro
You are going to love this DIY canvas tote bag project!
BONUS FREE DOWNLOAD
Save Money On Your Craft Supplies
Download this FREE Guide to find 25 Ways to save money when you buy craft supplies so that your beautiful creations cost less.
Save Money On Your Craft Supplies
Download this FREE Guide to find 25 Ways to save money when you buy craft supplies so that your beautiful creations cost less.
Directions:
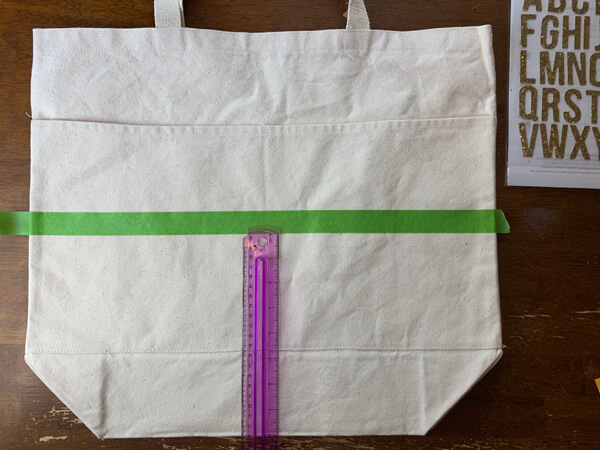
Step 1: Measure & Tape
Figure out how high you want the rubber coating to go up from the bottom of your bag. I decided I wanted to go up about half way, which was 8 inches.
Using your painters tape, tape off that section all the way around your DIY waterproof tote bag. Press it down really hard, I scraped it with my fingernails to ensure that no paint would seep underneath.
Make sure your tape line matches up on the sides so that your lines will meet when your bag is standing.

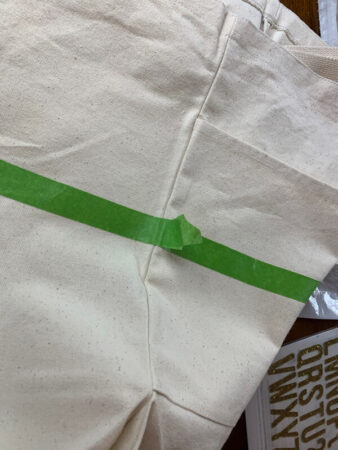
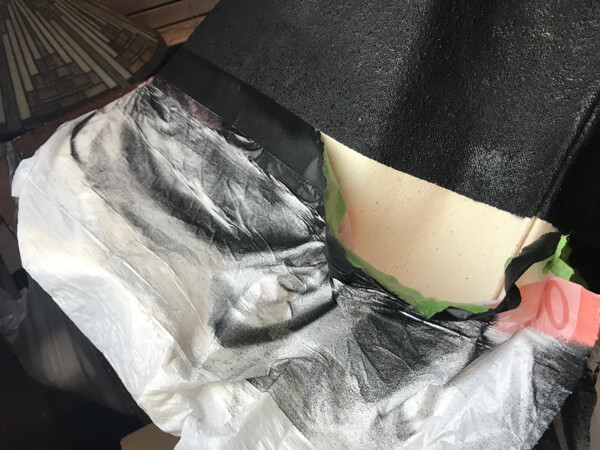
Step 2: Double Tape Bag To Protect It
Since you are working with spray paint, you need to protect the part of your bag that you do not want painted.
Tape your bag on top of the other tape. Easy!
Now tuck the trash bag inside your tote bag so it's out of the way.
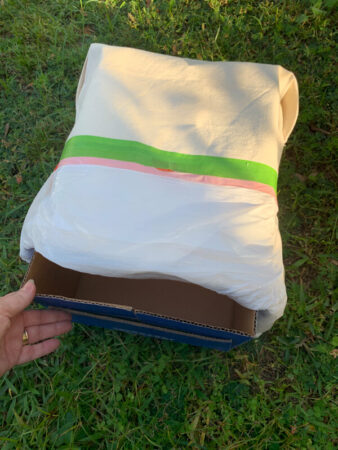
If found an amazon box to slide the DIY waterproof tote bag onto while I spray painted it. It made it very handy.
If you feel that the spray might get everywhere on the tote, simply use more painters tape and add cover the area you don't want paint getting on with a cut up trash bag.
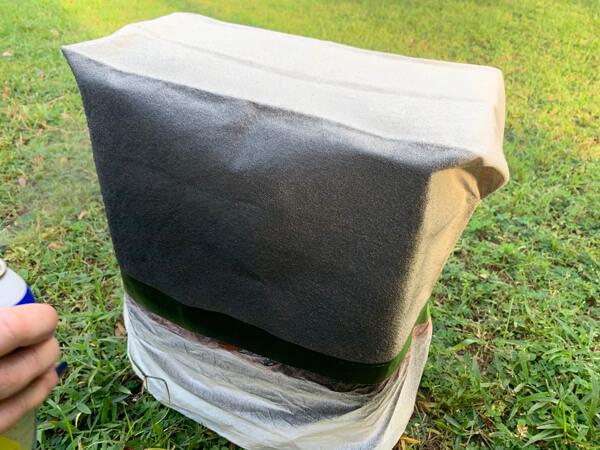
Step 3: Paint & Let Dry
Now comes the fun part, painting! Spray, spray, spray! You'll want to do a couple coats to ensure it's truly a waterproof tote bag.
Let dry. My paint can said to let it sit for 4 hours or until dry.
Next comes the monogrammed tote bag ideas!
Step 4: Peel Off The Bag & Tape
This is such a satisfying process to peel off the painters tape and reveal a nice straight line where the waterproofing starts.
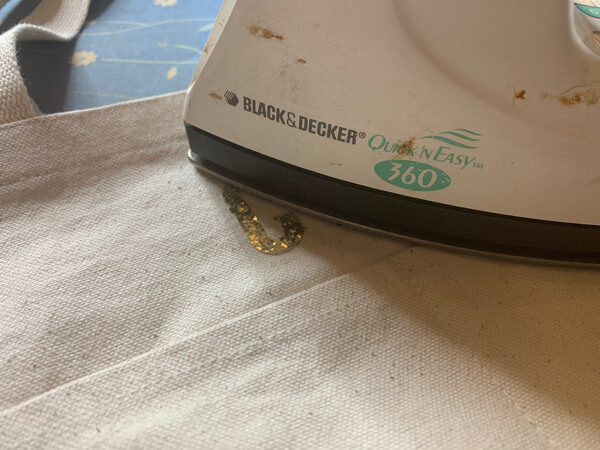
Step 5: Add Iron-On Monogram Letters
Read the directions on your monogram iron-on letters. Then apply the letters according to instructions where you want the letters to go.
The directions on my letters said to leave the plastic on and make sure to keep moving in a circle for 20-30 seconds. Then I needed to iron the back side (the inside) the same way. Talk about easy!
Since this DIY canvas tote bag project has two sides to the bag, one with pockets and one without, make sure you are adding the letters to the side you want them to be on.
Lastly, if you are using three monogram letters, you'll want to be sure that you measure the center of the DIY waterproof tote bag first and then how far you want them to be apart. You may want to add a strip of painters tape and then mark the center on the tape.
Step 4: Add Additional Embellishments
While this DIY waterproof tote bag is so cute as it is, you may want to add other embellishments.
Like adding a couple of strips of velcro to the inside so it helps to contain all the stuff inside if it falls over.
Or, you could add ribbon to the handles with fabric fuse tape.
Then, you can always stuff the tote full of goodies too! Like adding some:
- books
- magazines
- water bottle
- notepad
- pens
- hand sanitizer
- mini sunscreen
- gum
- lip balm
- hand lotion
BONUS FREE DOWNLOAD
Save Money On Your Craft Supplies
Download this FREE Guide to find 25 Ways to save money when you buy craft supplies so that your beautiful creations cost less.
Save Money On Your Craft Supplies
Download this FREE Guide to find 25 Ways to save money when you buy craft supplies so that your beautiful creations cost less.
- See how this DIY waterproof liner makes any tote into a beach or pool bag.
- You can even add a pretty liner to a plain tote bag.
- Learn how to make more inner pockets to a tote bag.
- See how this big bow and ribbon makes this tote extra cute.
- Make and add an leather tassel to your gift tote.
What Does It Cost?
- Large Natural Canvas Tote Bag With Pockets – $3.49 (@ Hobby Lobby)
- Plasti Dip Spray Paint – $4.96 (@ Walmart – can be found at hardware stores too)
- Iron-On Monogramm Letters – prices for individual letters start at 89¢ (@ Hobby Lobby)
- Painters Tape – $0
- Trash Bag (or something to cover the part of the bag you are NOT painting) – $0
- Iron – $0
- Ruler – $0
Total Cost: As Low As – $9.34 (bag, plasti dip spray paint, (1) iron-on letter – depending on the price of the letter)
As High As: $11.12 (bag, plasti dip spray paint, (3) iron-on letters – depending on the price of the letter)
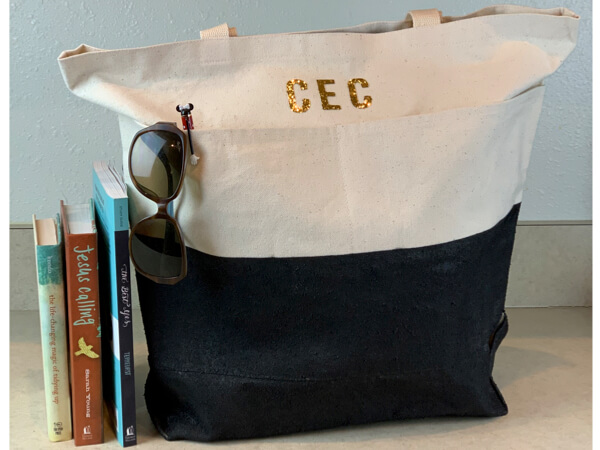
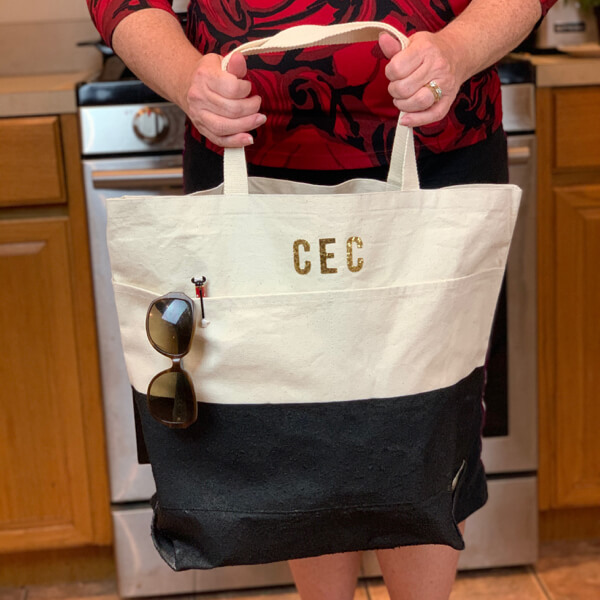
See how easily you can do this project?!
Your friends and family are going to love this gift! It's a great looking tote bag that you made yourself!
Plus, there are some great monogrammed tote bag ideas that you can do to make this bag extra special.
And this DIY canvas tote bag project is very affordable! It looks like an expensive bag – but didn't cost an arm or a leg!
YOUR TURN: Who are you going to make this DIY waterproof tote bag for this year? Let me know in the comments below!