You don't even need an art degree to make these Celebration Plates!
I've found a great way to make some simple painted plates that don't take a lot of time or talent to do.
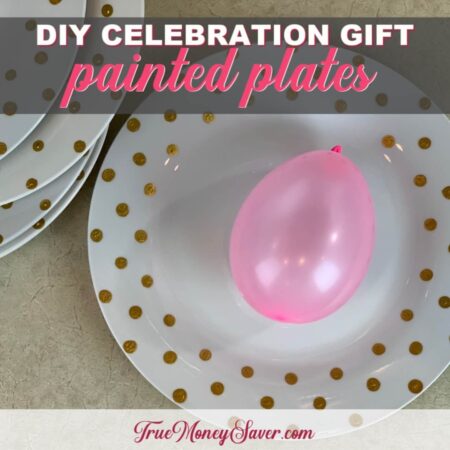
You can produce these easy painted plates in one evening and use them for a great gift the next day!
These plates are so simple to make! Just a little bit of measuring and a whole lot of dabbing is needed.
Making impressive looking gifts is easier than you think when you have the right supplies. Enamel paint works great for this project and is so affordable.
So let me show you how I made these Celebration Plates!
This post is part of our 30 Days of Homemade Gifts Series. 30 gifts that are easy (and cheap) to make, but also something you’ll be proud to give.
Each Homemade Gift has to meet 5 stipulations in order to maximize your money and make it easy for a busy mom to do:
- Easy to obtain supplies – Supplies are things you might already have on hand or are easy to find at Walmart or a craft store so you can get them in the same day you want to make it.
- Easy to make – Supplies are easy to work with or use so that anyone could do it… not caustic… so you could do the craft with your kids.
- Quick to make – It can be made in 30 minutes or less so it’s possible to make this gift in the middle of the night with products most likely already have on hand. (Note: The 30 minute guide is your “hands on” time, dry time is excluded. This project takes extra drying and baking time.)
- Cheap to make – You should be able to make the project without spending more than $10.
- Substantial – Each gift is “big” enough that you'll feel confident giving it alone and not having to add a gift card to it.
BONUSES:
Multiple uses – Multiple gifts can be made out of the same supplies giving you options to use up all the supplies you buy.
Saving Money Double Bonus: Try to think about what you already have on hand to upcycled and save more money.
So are you excited to get painting plates? Let's do this!
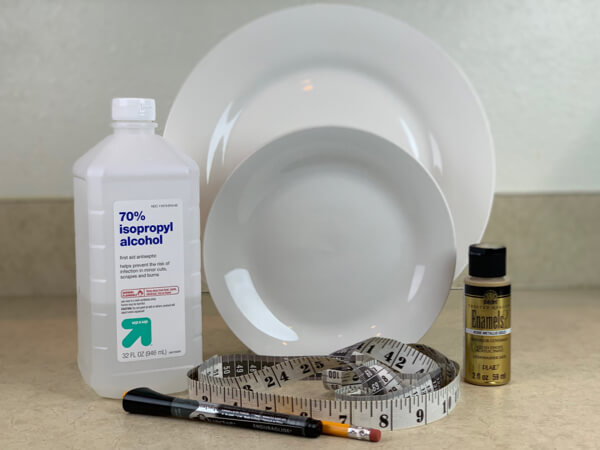
Supplies For Painting Plates:
- Dollar Store Ceramic Plates – $1 (@ Dollar Tree)
- Multi-Surface Dishwasher Safe Paint – $1.97 (I used Folk Art Enamels from Walmart. NOTE: If you choose Silver, then it'll match your Mason Jar Monogrammed Glasses)
- Pencil with eraser (or small round sponge dobber)
- Dry Erase Marker
- Paper towels
- Rubbing Alcohol
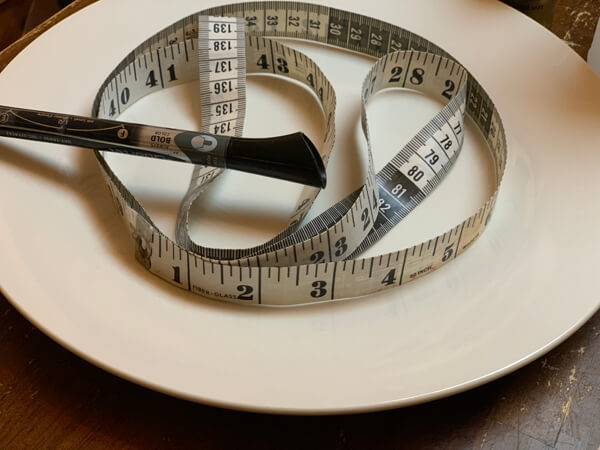
- Fabric Measuring Tape (can be found in the sewing supply section, $2.47 @ Walmart)
- Small piece of tape to hold the measuring tape together
- Paper plate
- Oven for baking to cure the paint
As you can see, there are not many supplies to purchase for this project. Just plates and paint!
The biggest problem you will have is deciding what colors to use and how many plates to make!
Do you want matching small plates too? What about mugs? The possibilities are endless!
BONUS FREE DOWNLOAD
Save Money On Your Craft Supplies
Download this FREE Guide to find 25 Ways to save money when you buy craft supplies so that your beautiful creations cost less.
Save Money On Your Craft Supplies
Download this FREE Guide to find 25 Ways to save money when you buy craft supplies so that your beautiful creations cost less.

Directions:
Step 1: Wipe Down With Rubbing Alcohol
First, wipe down the plate with rubbing alcohol to get rid of any oil and residue so that the paint will stick well.
Also, this is a good time to take any stickers off the back of the plate.
Step 2: Measure The Inside Ring Of The Plate
We are going to create an easy design, but we need to measure the plate so that we can easily space the dots appropriately.
Lay the measuring tape down inside the rim of the plate. Roll up the measuring tape on the inside of the plate so it doesn't get in your way.
Add a small piece of tape to the nearest inch mark. The inside circle of the plates I bought measured 22″, so that's where I taped the the start of the measuring tape to the 22″ mark.
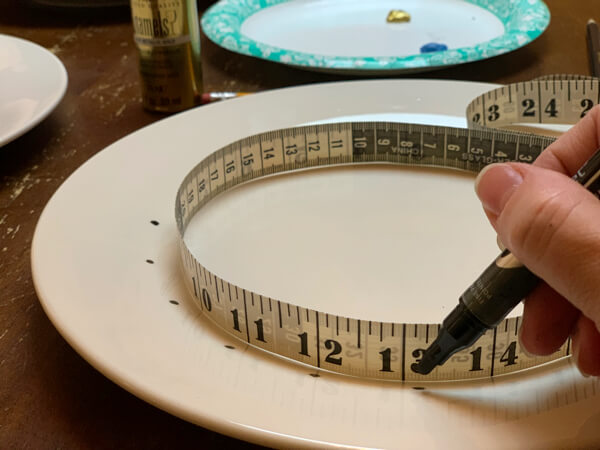
Step 3: Add A Dot At Every Inch With Your Dry Erase Marker
To the rim of where the plates dip on the inside, make a mark at every inch with your dry erase marker.
This will give you a guide to go by while painting plates with your design.
You'll obviously want to remove the measuring tape from your plate before painting.
If you have helpers, you could pass this step off to a child to make the marks on the plate because they do not need to be perfect. You just need to know where the 1″ mark is before you start painting.
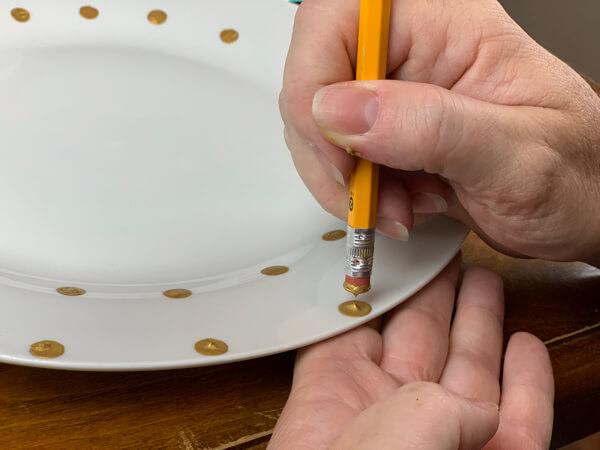
Step 4: Start Painting Plates – Inner Dots
Add a small amount of your multi-surface paint to a paper plate.
Dip your pencil eraser or sponge dobber to the paint and add a dot in between the dry erase marker dots to make the inner dots on your plate.
I found that I had to redip my pencil eracer after each dot in order to have the size dot I wanted. Also, make sure you notice the pressure you're using as you dab the paint so that you have uniform dot sizes.
Make a mistake? Just wipe the paint away with a paper towel and a little bit of rubbing alcohol. This paint is so easy to work with that this might just be the start of your enamel paint crafts collection!
Step 5: Remove Dry Erase Marker Dots
You don't need the dry erase marks now that you've got your real polka dots started. After you are done painting your inside rim of dots, remove the dry erase marker dots with a little bit of rubbing alcohol on a paper towel.
Be careful not to touch the painted dots.
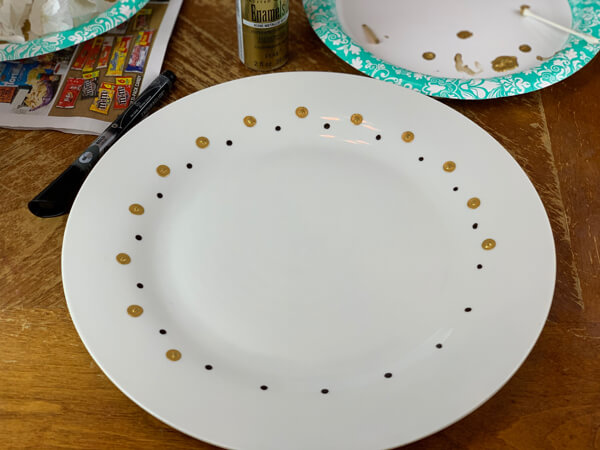
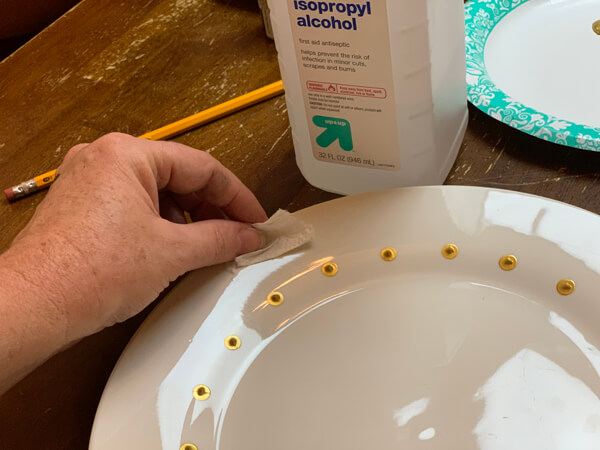
Step 6: Add Outer Dots
Make sure to wipe the outside edge with a little rubbing alcohol and paper towels. This will ensure the paint has a clean surface (no hand oils) to attach to.
On the outer rim of the painting plates, add a dot striaght across from the inner dot. In other words, your outter dot will be directly in line with your inner dot.
Continue all the way around the plate.
Remember, this paint is super forgiving. If you don't like the way one dot looks, or you touch one of the inside dots and make a smear, just wipe it off with a paper towel and some rubbing alcohol and you can paint a new one. Easy peasy!

Step 7: Add Middle Dots
Now it's time to make the design pull together by painting plates with the middle dot. Start adding the middle dots in the center between the inner and outer dots so that they look like like the number 5 on a domino or set of dice.
Continue adding these middle dots all the way around.
Did you realize how easy this was going to be? Fun, right?!
CAUTION: If you are doing a number of plates, know that the paint your using will start to dry out on your plate and will start to make globs. Wipe your pencil eraser regularly and just add a new dollup of paint on your plate when this happens.
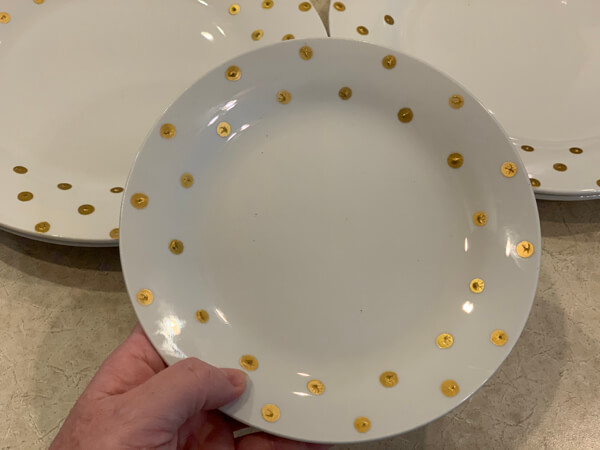
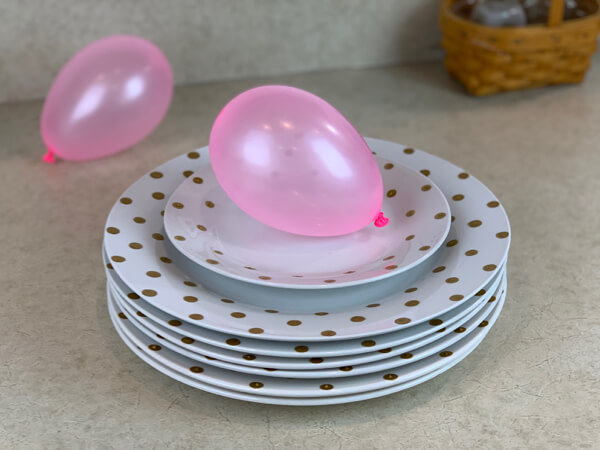
Step 8: Smaller Plates – Measuring And Dotting
The smaller plates have a smaller outer rim so three rows of dots would be too many.
Instead of measuring the middle of the plate, this time I measured an inch on the outside rim and made my dot there. I still added a dot at every inch. But instead of adding three rows of dots, I only added two rows of dots.
After the outer row was done, I simply put a dot in between to make my pattern. This makes these smaller plates super simple and fast to paint.
Step 9: Painting Plates Dry Time
Once you have finished all the painting plates that you are making, they need to dry according to package directions. My directions said they needed to dry for 1 hour.
Put them aside where your family and furry critters can't walk on them or accidentally use them or mess them up.
See how these easy painted plates are really to make? So easy!
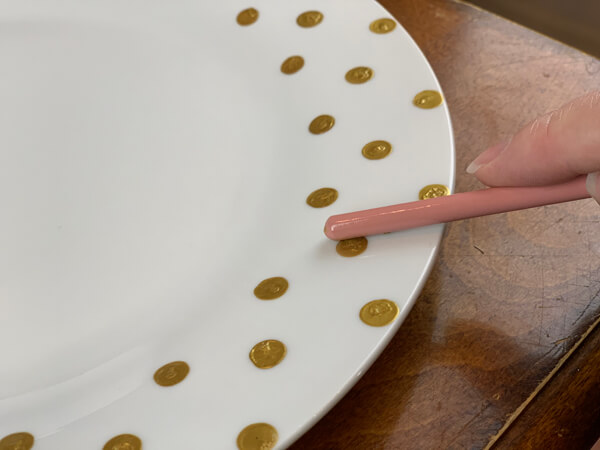
Step 10: Decide If You Want To Keep Your Peaks
It's important to note that the paint is going to look EXACTLY like it does when you first put it inside the oven.
It is not going to smoosh down or melt into a pool, or merge together to make new colors.
How you paint it is how you get it.
I had little pointed peaks on my dollops and I thought they would melt down into my dot when it was baked, but that was not the case and I ended up with pointy dots that scratch your fingers when you wipe across them.
To avoid this aggravation (unless you are like my husband and you like the pointy dollop look and don't normally wipe your hand across your plate… to each his own…) then you can paint as usual and after about 10 minutes of drying time, take the end of a smooth round paint brush and roll it over the paint dollop to smooth it out.
Since this is part of the dry time anyway, you are not adding extra time to the project, it's just more “hands on time.” I was pleasantly surprised by how smooth it came out and I loved the ones I squished with the paint brush. No more pointy peaks!
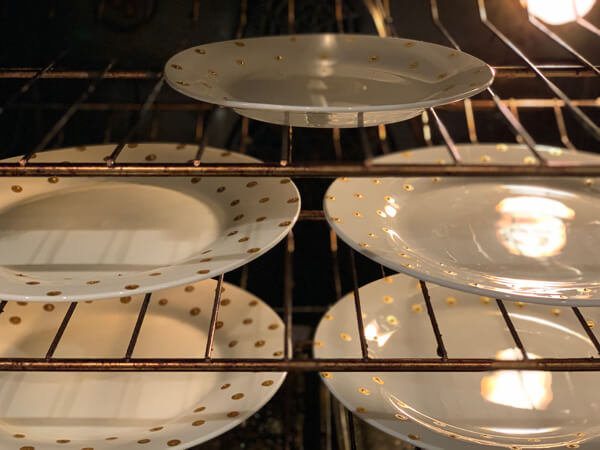
Step 11: Bake According To Paint Directions
Once the painting plates have dried for one hour, bake according to the directions on the paint.
My paint said to put the plates in the oven before turning it on, then turn it on to 350º and bake for one hour. Then turn the oven off and leave the plates in there until they are cool.
BONUS FREE DOWNLOAD
Save Money On Your Craft Supplies
Download this FREE Guide to find 25 Ways to save money when you buy craft supplies so that your beautiful creations cost less.
Save Money On Your Craft Supplies
Download this FREE Guide to find 25 Ways to save money when you buy craft supplies so that your beautiful creations cost less.
What's It Cost?
- Dollar Store Plates – $1 for either size plate (@ Dollar Tree)
- Multi-Surface Dishwasher Safe Paint – $1.97 (I used Folk Art Enamels from Walmart)
- Pencil with eraser (or small round sponge dobber)
- Dry Erase Marker
- Paper towels
- Rubbing Alcohol
- Fabric Measuring Tape (can be found in the sewing supply section, $2.47 @ Walmart)
- Small piece of tape to hold the measuring tape together
- Paper plate
- Oven for baking to cure the paint
Total Cost:
Set of 4 plates is $5.97 = $1 each plate for 4 plates + $1.97 gold multi-surface paint
For under $10 ($9.97) you could give a set of 4 matching small and large plates. Fun!
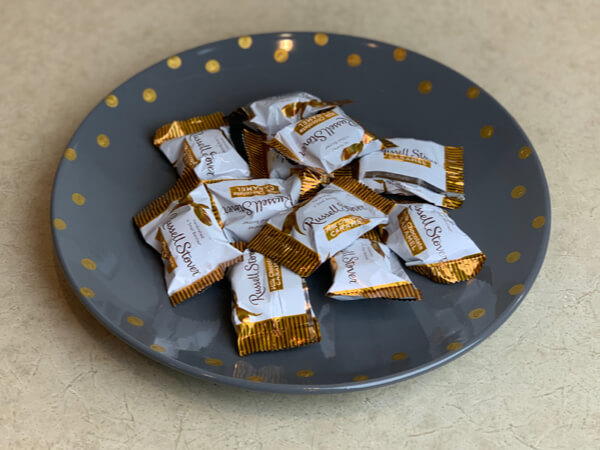
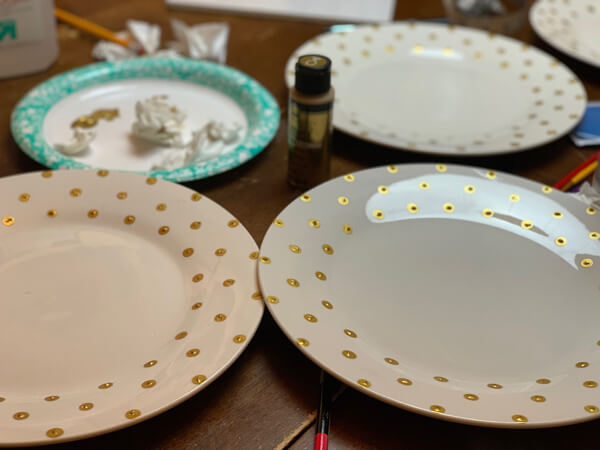
More Painting Plates Ideas:
Dots aren't the only thing you can paint on plates. Although, as you can see in the photo above, I used the same dot pattern on a grey plate to use as a special birthday plate when we celebrate birthdays for our immediate family. {We always make the birthday child's favorite meal and dessert, so we're going to use these new white celebration plates and the Birthday Person gets to use the special grey plate.}
Use your imagination and creativity to paint more designs on plates to give as gifts.
- Birthday ballons or candles
- Christmas ornaments, stockings, Christmas lights, presents or festive trees
- Monogrammed plates
- Simple flowers, leaf patterns
- Geometric designs
- Random dots with varying sizes (looks like confetti)
You could also make cookies for Santa plates, Christmas cookie exchange plates, “Giving” plates, Grandma's recipe plates, and so much more!
As you can see, you can produce these easy painted plates in one evening and use them for a great gift the next day.
These celebration plates are so simple to make! Just a little bit of measuring and a whole lot of dabbing is all that is needed.
Making impressive simple painted plates is easier than you think.
YOUR TURN: Are you going to be painting plates to give as a gift? Let me know in the comments below!