I've received several and there's nothing like receiving such a warm and cozy gift.
So why wouldn't you want to give such a warm and cozy gift too? Well I've come up with a way to make an easy no sew fleece blanket that super cheap and it's super fast to make too! ![]()
Plus, when you see how cute it is, you'll just want to make one for everyone on your gift list this year!
You can make it into a baby blanket, car blanket, sports or picnic blanket! It can be just any kind of DIY Pom Pom Fleece Blanket you want!
And your family can get in on the fun by helping you! Isn't that great?! Of course it is!
This no sew fun fleece blanket tutorial will get you up to speed in no time so you can get cranking on your gifts!
This post is part of our 30 Days of Homemade Gifts Series. 30 gifts that are easy (and cheap) to make, but also something you’ll be proud to give.
Each Homemade Gift has to meet 5 stipulations in order to maximize your money and make it easy for a busy mom to do:
- Easy to obtain supplies – Supplies are things you might already have on hand or are easy to find at Walmart or a craft store so you can get them in the same day you want to make it.
- Easy to make – Supplies are easy to work with or use so that anyone could do it… not caustic… so you could do the craft with your kids.
- Quick to make – It can be made in 30 minutes or less so it’s possible to make this gift in the middle of the night with products you most likely already have on hand.
- Cheap to make – You should be able to make the project without spending more than $10.
- Substantial – Each gift is “big” enough that you’ll feel confident giving it alone and not having to add a gift card to it.
BONUSES:
Multiple uses – Multiple gifts can be made out of the same supplies giving you options to use up all the supplies you buy.
Saving Money Double Bonus: Try to think about what you already have on hand to upcycled and save more money.
So are you ready to make these custom fleece blanket gifts? Let's get busy!
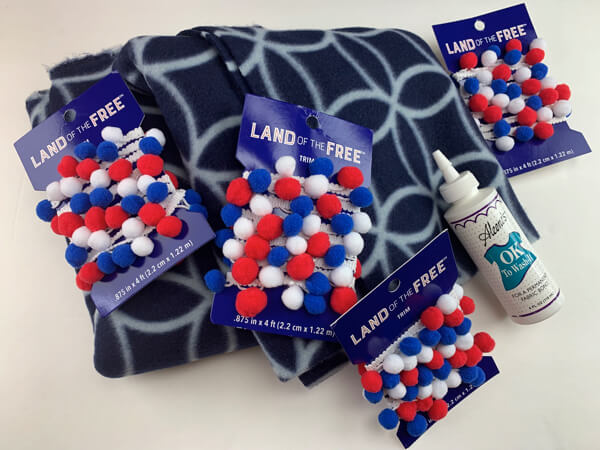
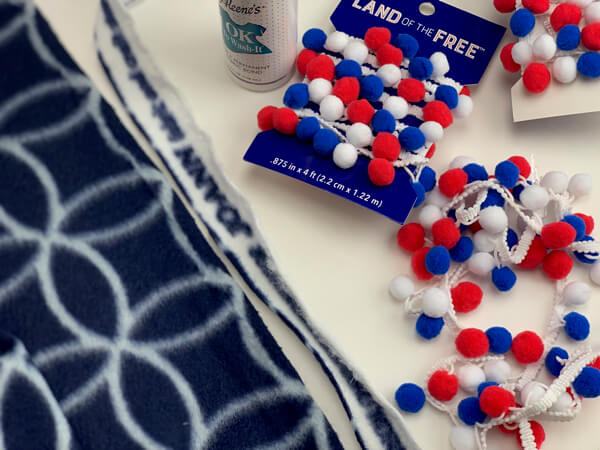
DIY Pom Pom Fleece Blanket Supplies:
- Fleece Yardage (See explanation below.)
- Aleene's OK to Wash-It Glue or Aleene's Permanent Fabric Fusion Adhesive (or E-6000 if you already have it)
- Pom Pom Trim (long enough to cover the shorter ends OR all the way around, depending on your budget)
- Sewing Pins
- Scissors
- Stitch Witchery (may not need, depends on amount of fringe you buy AND if you want to attach a tie)
- Iron & damp rag (if using Sticch Witchery)
- Matching Ribbon (optional if want to tie it up)
- Velcro piece (optional for tie)
Pom pom trim can be expensive. Look for after season deals, use coupons, wait for sales or only do the short sides of the DIY Pom Pom Fleece Blanket.
First, you need to determine the size yardage you need for your easy no sew fleece blanket, and then what purpose you want it for.
This no sew fun fleece blanket tutorial will work the same for any yardage you choose.
One yard of fabric is perfect for a car blanket, a lap blanket for sports, a blanket perfect for two people to sit on a cold bleacher, a shoulder wrap and many other uses. (this is the size blanket I made and show in this post).
If you are wanting to give this as a car blanket, I measured it with one I already had and you would just need to purchase 1/4 yard more. That's not much more added cost, but you need to know it before you have your fabric cut.
If you are wanting more of a picnic blanket for the entire family to sit on, you would want to purchase more like 3 yards (which would be a long narrow blanket) or you could just make several single smaller fleece blankets.
BONUS FREE DOWNLOAD
Save Money On Your Craft Supplies
Download this FREE Guide to find 25 Ways to save money when you buy craft supplies so that your beautiful creations cost less.
Save Money On Your Craft Supplies
Download this FREE Guide to find 25 Ways to save money when you buy craft supplies so that your beautiful creations cost less.
DIY Pom Pom Fleece Blanket Gift Directions:
Step 1: Cut Off The Salvage
Depending on the raw salvage on your fleece (these are the sides where the machine held the fabric while making it), you may want to cut it off on your DIY Pom Pom Fleece Blanket.
Some salvages are different colored and some have writing on them. They will be distracting and not very pretty on your finished easy no sew fleece blanket. Go ahead and trim those parts off by just cutting a straight line down the side,
My camera focused on the trim, not the salvage, so I apologize for the blurry photo, but I want you to see what the salvage is that I cut off my blanket.
Step 1A: If Less Trim: Create A Nice Edge (money saving option)
Let's say that you found the perfect pom pom trim for your blanket, but the store only has enough to put it on 2 of the 4 sides of your blanket. Not to worry, I have a solution for you: Stitch Witchery.
On the sides of the blanket that won't have the fringe trim, simply give them a finished edge with stitch witchery.
Here's how:
- Fold in the fleece long edge one inch.
- Place the stitch witchery in between the fold, apply a damp rag and the iron. Hold the iron on the fold for the allotted time the stitch witchery requires.
- Then proceed down the rest of the edge, moving the wet rag and the iron down until the edge is complete.
- Repeat on other side.
This option will save you 1/2 the cost of your trim. That can be significant if you can't find something on clearance like I found.
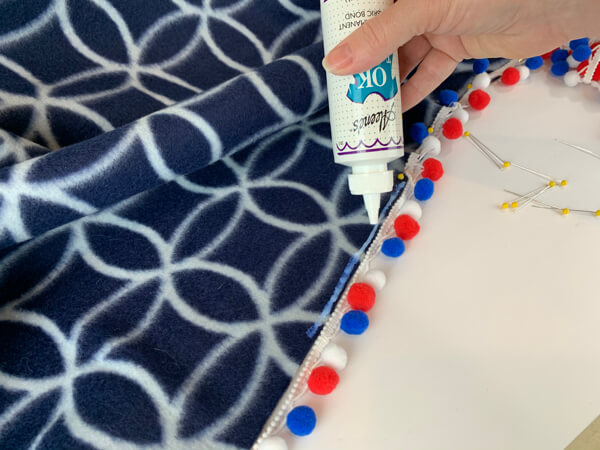
Step 2: Gluing Pom Pom Trim
First, unroll your pom pom trim from the roll or card. Make sure it is not twisted because you don’t want to glue it down twisted onto your DIY Pom Pom Fleece Blanket.
Then, starting at one raw end, run a small bead of glue on the edge. If the beginning of the trim ribbon is not nice, you may want to fold the edge over ¼ inch and then start gluing. This will just make it look nicer.
Press the pom pom trim into the glue. Depending on the size of your trim, be careful to not put too much glue as it may seep out. You can keep a paper towel near by to wipe up any excess glue seepage and to wipe your hands.
As you are pressing the trim into the fleece, make sure that the pom poms are hanging outward away from the blanket. Also make sure that you are not gluing the pom poms to the blanket and that they are not sitting in the glue as you continue to glue the rest of the trim.
![]()
Use pins to hold the trim and fleece together while you are working on the rest of the blanket. The glue needs to be held in place while it's tacky and setting up. This will also prevent the trim from slipping and drying wonky looking.
You can see the spacing of my pins in the photo above, It's not super close, but enough to hold the fringe in place so it dries in a straight line. About every 2-3 inches apart.

Once you have hit the end of your pom pom trim but you still have more to add, you can do two things:
- If the end looks good, just glue it down and keep going (that's what I did at the corner).
- If the end looks shabby, fold it over and glue it down, and then start the next piece of trim the same way with a fold.
Continue pinning as you go.
These custom fleece blanket gifts are going to look great!
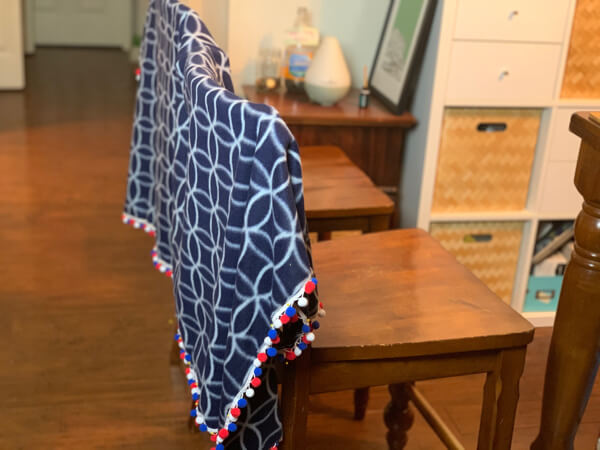
Step 3: Set Aside Your DIY Pom Pom Fleece Blanket Gift To Dry
Once you have completed gluing and pinning your pom pom fringe to your fleece blanket, set aside to let dry for a couple of hours or even overnight.
I hung my blanket over the backs of some chairs in our dining room:
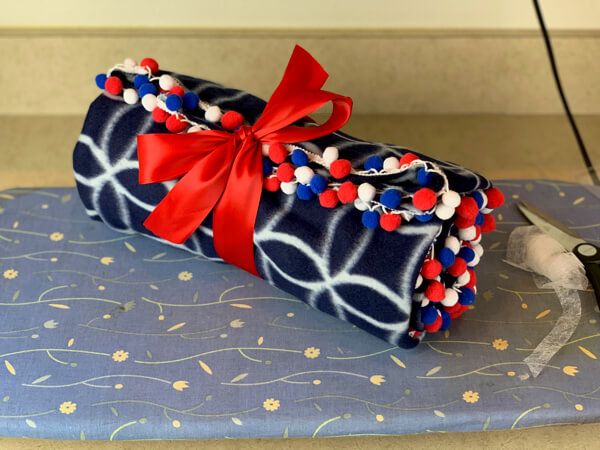
Step 4: Remove Pins & Wrap With Ribbon
Once everything is dry (about 4 hours), remove pins and fold or roll it up.
If you want to create a ribbon to keep the blanket folded together neatly as part of your custom fleece blanket gift, you have two options:
1. Stitch Witchery Bow Tie (This is what I did)
First, wrap your ribbon around your fleece burrito, tie how you want it to look and cut ends.
Next turn your blanket over use two pins to pin the ribbon to the middle of the back, where you want the ribbon to attach to the fleece blanket.
![]()
Add two more pins below the ribbon to mark where it's going to go so that you can move the ribbon around.
Now cut a strip of 3 inches of your Stitch Witchery to glue down the ribbon to the back of the blanket. It's perfectly fine for it to overlap like you see in my photo, that just reinforces the area.

Next, tuck the stitch witchery underneath the ribbon (between the ribbon and the fleece blanket) and get a damp rag to put over it and steam it for 10 seconds using your iron on the wool setting.

Yay! Your blanket has a tie to keep it tidy in the car. You can see where it's stuck in the center:
![]()
2. Velcro Tie
The second option is to use velcro so that you don't have to tie the ribbon to keep your blanket tidy.
To do this, follow the same intstructions as above, except add the male and female sides of the velcro to the ribbon (after folding the ends to make them have a finished look) so they can fold over each other and lay flat on your blanket.
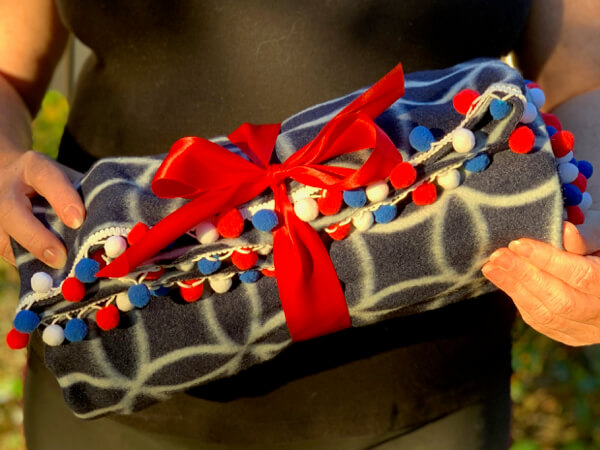
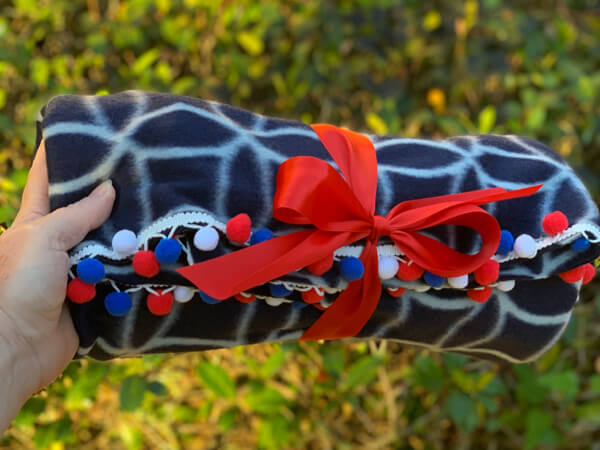
That's it! Your pom pom fleece blanket is finished and you can wrap up for your fantastic gift to give. This no sew fun fleece blanket tutorial wasn't so hard after all!
Create The Ultimate DIY Pom Pom Fleece Blanket Gift:
I've got a few more ideas to add your custom fleece blanket to a pack of goodies and make it an over-the-top gift to give.
Picnic Gift: Find a great basket at your thrift store to gift your blanket with. Add some glasses, trail mix or granola, mini cheese board and knife, or maybe a sun hat and sparkling water.
Momma on the Go: Gift your DIY Pom Pom Fleece Blanket with a tote bag, baby wipes, bug spray, sun block, snacks & more!
Tailgater Gift: Gift with a basket, fabric team bunting, cheer poms, team cup or more.
Beach Bum: Give with a tote, sunblock, Chapstick, sun hat, sunglasses and snacks.
Car Blanket: Give with a Ziploc “Big Bag” size with handles and include a variety of hand wipes to be used in the car such as, Windex Wipes, Armor All Wipes, general use wipes for after you fill your tank with gas.
You see, it's so easy to give this blanket by itself, or as a great starting point for some wonderful custom fleece blanket gifts.
BONUS FREE DOWNLOAD
Save Money On Your Craft Supplies
Download this FREE Guide to find 25 Ways to save money when you buy craft supplies so that your beautiful creations cost less.
Save Money On Your Craft Supplies
Download this FREE Guide to find 25 Ways to save money when you buy craft supplies so that your beautiful creations cost less.
Total Cost:
- 1 Yard Fleece – I found mine on clearance after the season for $3.29/yard
- Aleene's OK to Wash-It Glue or Aleene's Permanent Fabric Fusion Adhesive – $5.88 (or E-6000 if you already have it)
- Pom Pom Trim (long enough to cover the shorter ends or all the way around, depending on your budget) – Also found after the season on clearance = (Reg. $7 with 80% Off) = $1.40 x 4 pkgs = $5.60
- Pins
- Iron & damp rag
- Scissors
- Stitch Witchery – $4.87
Total Cost: As low as $8.89 total (blanket and trim)
As much as $19.64 if you had to buy the fleece, glue, trim and stitch witchery.
So as you can see, this easy no sew fleece blanket is super cheap to make and it’s super fast to make too…well, it does require drying time, but that doesn't require supervision! 🙂
And it's so cute! Everyone on your gift list this year would love to have an easy no sew fleece blanket!
And since this no sew fun fleece blanket tutorial is so easy, you won't waste any time figuring out how to make it. Just glue, dry and go! Gotta love that!
Plus, these custom fleece blanket gifts can be turned into a baby blanket, car blanket, sports or picnic blanket! Yippee for multiple uses and gifts!
And since your family can get in on the fun, you can crank those gifts out and be done with your gift list! Yahoo!
YOUR TURN: What type of DIY Pom Pom Fleece Blanket are you going to make? Let me know in the comments below!