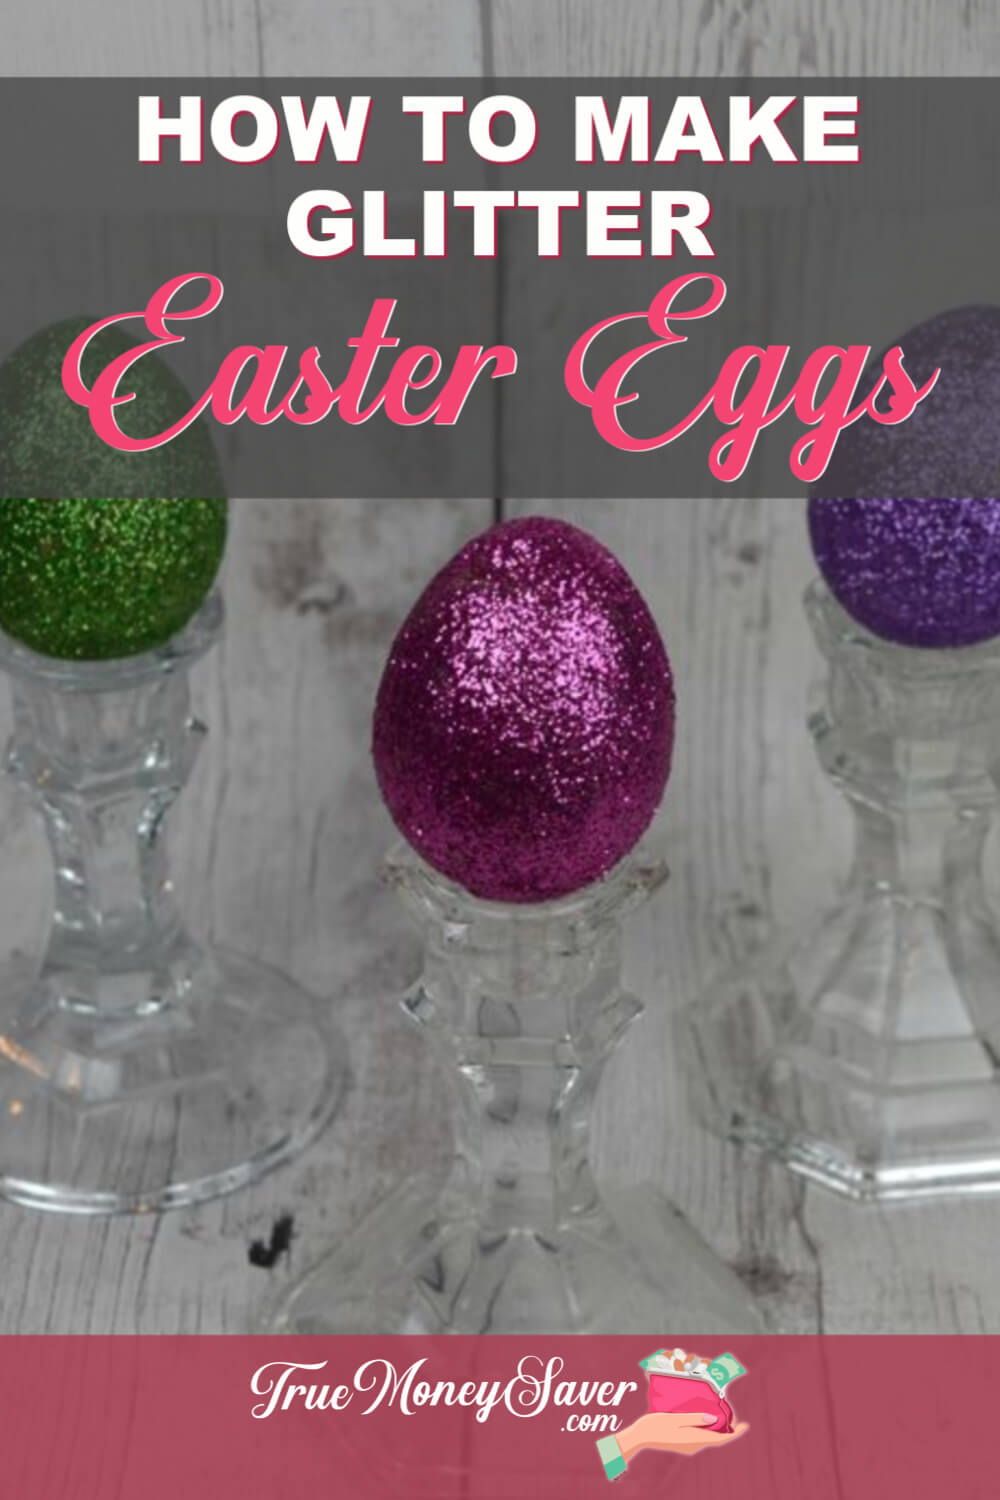
Finally a DIY glitter Easter eggs tutorial to add that extra sparkle for the holiday!
Finding the perfect centerpiece for your home isn’t always easy or budget-friendly.
Sometimes the better option is to create one yourself.
This craft idea combines techniques from two previous projects.
Remember that gorgeous DIY Dollar Tree candy dish and the Glittered Fruit?
Well, use that same dish and add in some Paper Mache Glitter Easter Eggs. It will turn out so pretty!
This DIY glitter Easter eggs tutorial will show you how to easily glitter eggs for your special Easter celebration.
And, you'll learn basically how to glitter anything so you'll be craft-wise for the next glitter project.
Plus, these DIY beautiful glitter crafts will look great in your home or as a hostess gift.
So are you ready to start this great glittering project? Let's get our sparkle on!
Supplies For DIY Glitter Easter Eggs:
- Candy Dish (Made from Dollar Tree)
- Paper Mache Eggs
- Glitter
- Mod Podge
- Paint Brush
- Spanish Moss (optional)
- Glass Candlesticks (dollar store) or Wood Candlesticks (optional)
BONUS FREE DOWNLOAD
Save Money On Your Craft Supplies
Download this FREE Guide to find 25 Ways to save money when you buy craft supplies so that your beautiful creations cost less.
Save Money On Your Craft Supplies
Download this FREE Guide to find 25 Ways to save money when you buy craft supplies so that your beautiful creations cost less.
What's so great about this DIY glitter Easter eggs is that you can do it in front of the TV catching up on your latest shows. Yes, it's that easy!
What else could you glitter besides eggs for Easter? Since you can learn how to glitter anything, here are a couple more ideas!
Directions:
Step 1:
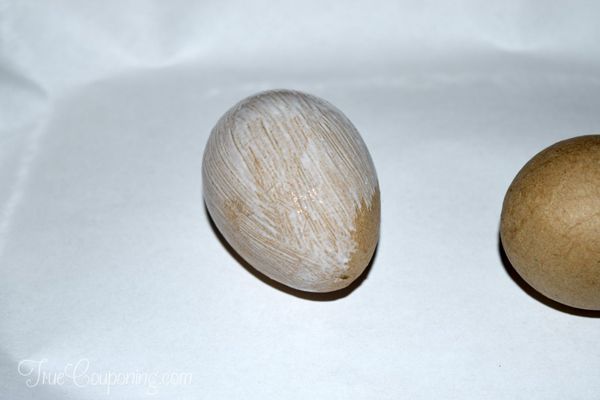
Grab your pack of paper mache eggs and set them up on an area ideal to catch the glitter when you make these DIY glitter Easter eggs.
I took the top of my son’s puzzle box and placed a piece of computer paper in there to catch the excess glitter.
Step 2:
Take your paint brush and dip it into your Mod Podge and cover the entire paper mache egg.
Just cover one egg at a time so the mod podge doesn’t dry up to quickly.
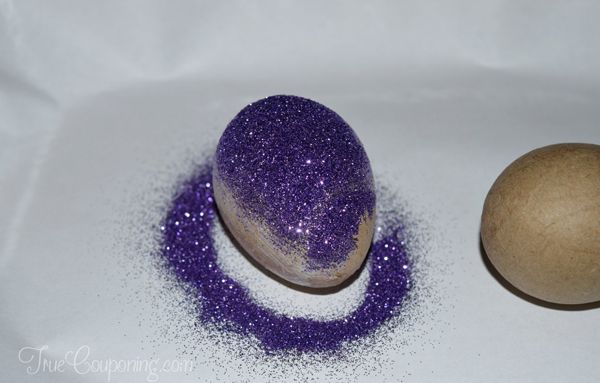
Step 3:
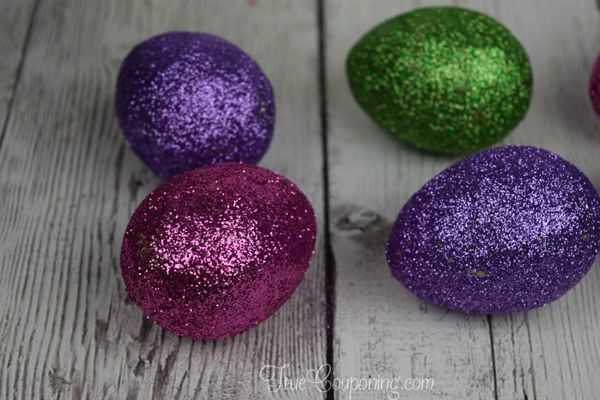
Grab the glitter of your choice and pour it all over the egg, carefully rotating until the entire surface is covered.
You'll see how easy this DIY glitter Easter eggs tutorial really is!
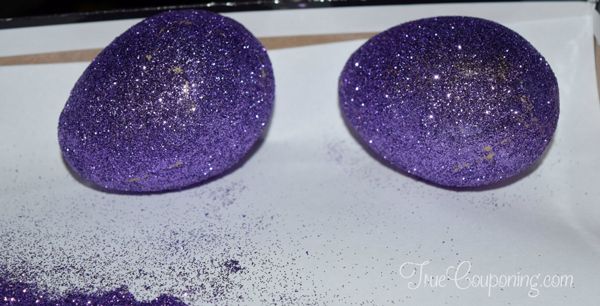
Step 4:
Continue on and do the rest of the eggs and allow them to dry for at least 20 minutes for your DIY glitter Easter eggs to cure.
BONUS FREE DOWNLOAD
Save Money On Your Craft Supplies
Download this FREE Guide to find 25 Ways to save money when you buy craft supplies so that your beautiful creations cost less.
Save Money On Your Craft Supplies
Download this FREE Guide to find 25 Ways to save money when you buy craft supplies so that your beautiful creations cost less.
Your hands might get sticky during this DIY beautiful glitter crafts tutorial, but your eggs will look amazing by the time you are through!
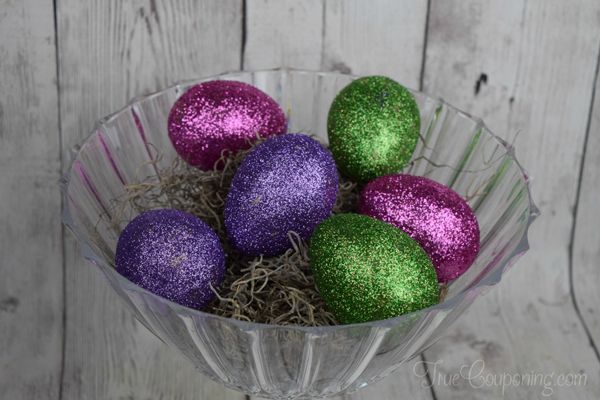
Step 5:
Once they are complete, fill your Dollar Tree Candy dish up with Spanish moss and carefully place your eggs on the top.
Display this home décor piece anywhere in your home and enjoy the glittery sparkle.
Another way to display your Glitter Eggs is to place them atop candlesticks. You can get clear, glass candlesticks at dollar stores or thrift store in various styles and heights to create a stunning display.
As you can see, this DIY glitter Easter eggs tutorial shows you how to easily glitter eggs for your special Easter celebration.
And, you'll learn basically how to glitter anything so you'll be craft-wise for your next great glitter project!
Plus, don't these DIY beautiful glitter crafts look great in your home?! I can't wait to glitter something else!
Your Turn: What else could you use this DIY glitter Easter eggs technique on for the holidays? Share with us below!