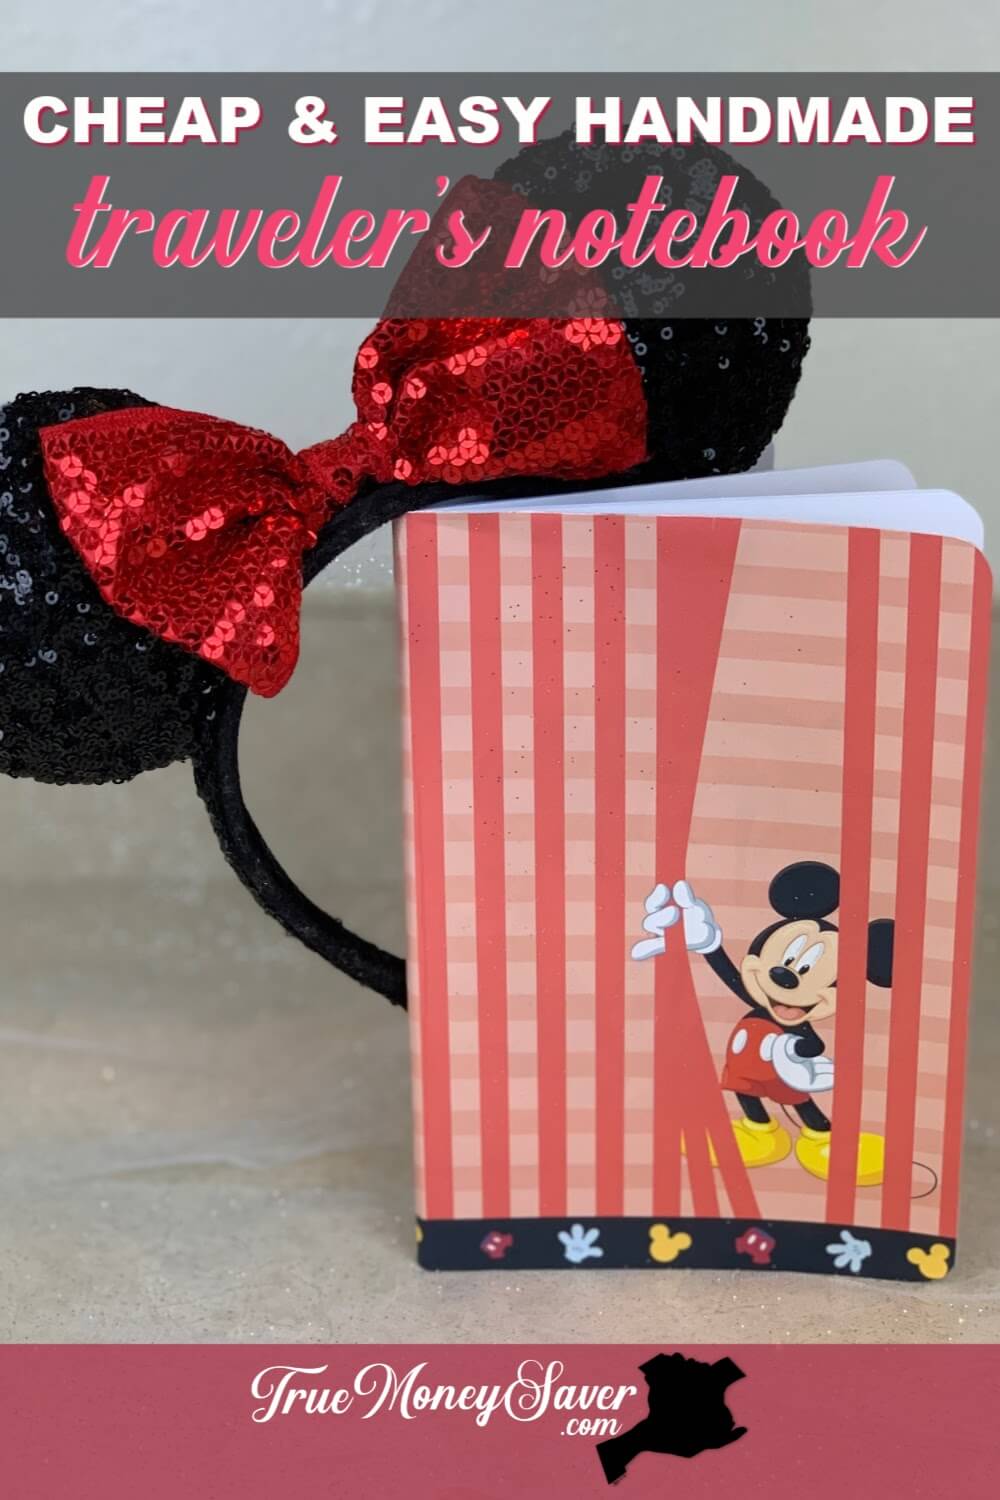
I have made a simple travel notebook before, and I loved the way they turned out.
It's so much fun to add all of the great things you find while traveling on vacation. Plus, being able to add your thoughts down on paper while you are traveling helps you remember all the great things you discovered and felt at the time. 
Do you have friends and family that travel? You won't want to pass up making these handmade traveler's notebooks as gifts this year.
While this travelers notebook is themed for a friend who is going to Disney World, I also wanted to make a Garden Journal. That would be a great place to keep your gardening plans and layouts, the seeds that were used in the garden, with sketches of your garden and plans for the future.
They can also be used as a Prayer Journal, as a Baby's First Year Book – to keep locks of hair or any special memories or momentos, or what about as a Christmas Gift Planner. You can add the list of who you're buying for, gift list ideas, buget reminders, pockets for receipts and any other fun ideas you think of.
And of course the list doesn't stop there! Use your imagination to figure out how it could help the people in your life.
These handmade traveler's notebooks are so great to give and they are so cheap to make too.
Your gift recipient will love something that is handmade and especially made for them.
This post is part of our 30 Days of Homemade Gifts Series. 30 gifts that are easy (and cheap) to make, but also something you’ll be proud to give.
Each Homemade Gift has to meet 5 stipulations in order to maximize your money and make it easy for a busy mom to do:
- Easy to obtain supplies – Supplies are things you might already have on hand or are easy to find at Walmart or a craft store so you can get them in the same day you want to make it.
- Easy to make – Supplies are easy to work with or use so that anyone could do it… not caustic… so you could do the craft with your kids.
- Quick to make – It can be made in 30 minutes or less so it’s possible to make this gift in the middle of the night with products you most likely already have on hand. (Note: The 30 minute guide is your “hands on” time, dry time is excluded.)
- Cheap to make – You should be able to make the project without spending more than $10.
- Substantial – Each gift is “big” enough that you'll feel confident giving it alone and not having to add a gift card to it.
BONUSES:
Multiple uses – Multiple gifts can be made out of the same supplies giving you options to use up all the supplies you buy.
Saving Money Double Bonus: Try to think about what you already have on hand to upcycled and save more money.
Let me teach you how to make a DIY travelers notebook right now! Let's get crafting!
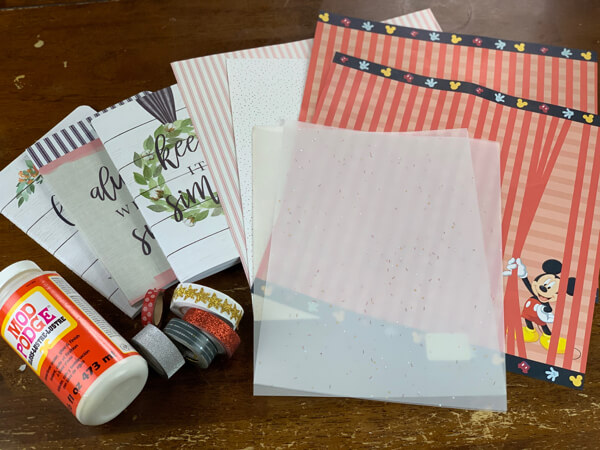
Supplies For Traveler's Notebooks:
- Notebook – My notebook has lined paper, but a plain one works also. (I got a 3 pk of notebooks @ Hobby Lobby for $6.99, and used my 40% Off coupon to get it cheaper = $4.19 = $1.40 each. I've also seen a similar three pack in the One Spot at Target for $5.)
- Scrapbook Paper – at least 1 piece (big enough that it will cover the journal on both sides of the cover) – 25¢ a sheet (@ Craft Stores. My notebook was 5-9/16″ wide so a 12″x12″ sheet of paper would work perfectly with room to spare.)
- Vellum Paper to make pockets
- Mod Podge – $1 (@ Dollar Tree)
- Scissors
- Paint Brush or Foam Brush
- Washi Tape
Other Supplies (Optional):
- Embellishments for cover
- Monogram stickers or precut wood letters to paint and glue on or inside
- Ribbons & Clips for page markers
- Tabs for dividing sections
- Pens
BONUS FREE DOWNLOAD
Save Money On Your Craft Supplies
Download this FREE Guide to find 25 Ways to save money when you buy craft supplies so that your beautiful creations cost less.
Save Money On Your Craft Supplies
Download this FREE Guide to find 25 Ways to save money when you buy craft supplies so that your beautiful creations cost less.
Directions For Handmade Traveler's Notebooks:
Step 1: Make Outside Cover
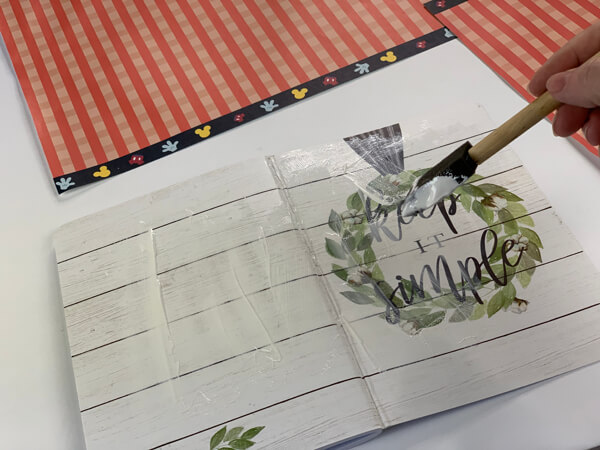
The first thing you need to do to make your Traveler's Notebook special is to make the outside cover.
You want to cover this with one full sheet of paper. If you cut the paper and piece it together it tends to peel up from all the opening and closing of the book, so try to keep it in one piece.
In order to do that you want to add Mod Podge directly to the front of your notebook and then press the paper right on top. Do not worry about cutting it to size yet, we'll make it perfect in the next step.
Make sure there are no air bubbles in between the paper and the cover.

If you are using a map, you'll want to get the creases out.
Use an iron or steamer so that you have a flat map to work with. Here are some tips you can use to get those creases out.
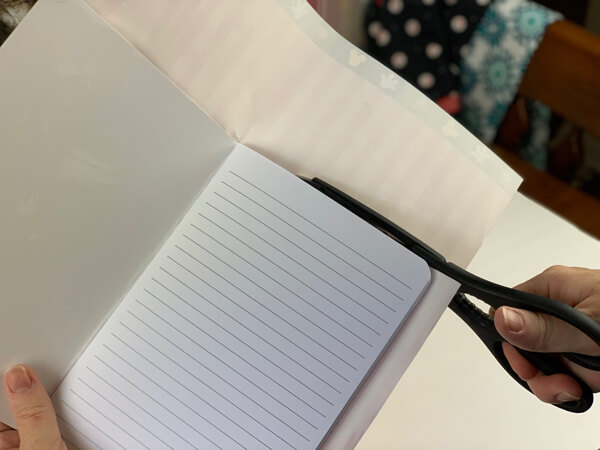
Step 2: Finish The Cover
In order to make your cover look the best with finished edges, cut the excess paper off the sides of your notebook. Get as close as you can without cutting the actual cover. Leave about a centermeter or two to rub off with a file.

Using a nail file (use the rough grit side) or a piece of sandpaper, rub the edges and wear down the scrapbook paper until it is smooth with the cover.
This makes the corners look especially nice.

Step 3: Create Pockets
I like to put a pocket on the very back side of the front cover. Before the first page of the travelers notebook even begins.
Making a pocket sounds complicated, but it's actually very easy.
Simply cut a rectangle of paper that's slightly smaller than the width of your inside cover. How high you go will depend on how deep you want your pocket to be.
Using Washi Tape, tape around the sides and bottom to affix it to the page.
To make the top flap cover, cut a strip of paper and lay it wrong side up above your new pocket. Align it where you want it to bend to open.

Tape it on the wrong side (making it flat in line with your pocket). Don't tape all the way to the very end of the paper.
Flip the flap over (bending the tape in half) and tape on that side too. This is your pocket flap!
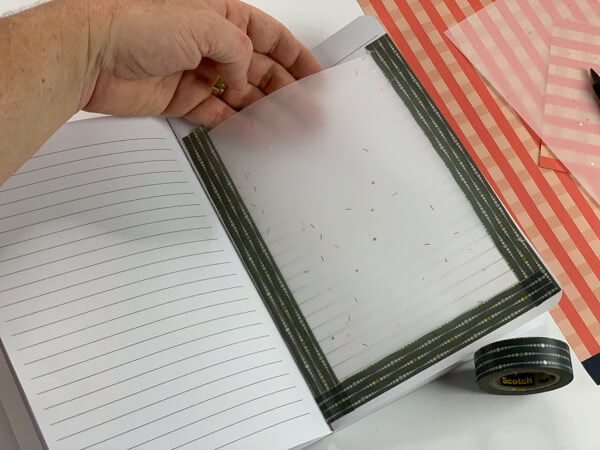
Step 4: Make More Pockets For Inside
You'll want to make more pockets to go inside your traveler's notebook for all the fun keepsakes you want to put inside.
I love to use vellum papers because they are slightly transperant making it fun to see the stuff inside a pocket, without it being clear.
Attach the vellum the same way you made the first pocket with washi tape. Obviously, the top flap is optional and I didn't put one on this pocket.
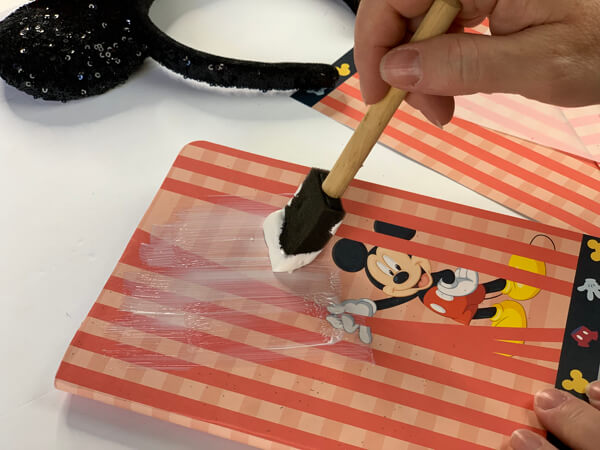
Step 5: Seal With Mod Podge
Since the cover is just paper and can rip or get stained, you'll want to seal it to protect it.
Lay the notebook onto a piece of wax paper.

Apply a thin coat of Mod Podge to the cover. Make sure you sweep across the cover with one fell swoop so that there are no stark brush strokes.
Let dry.
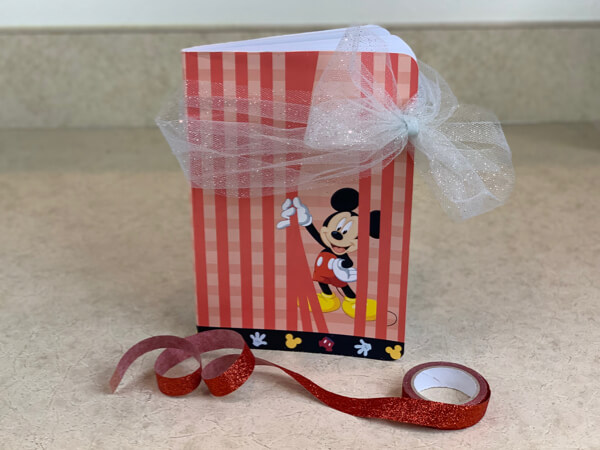
Step 6: Embellish
While this handmade traveler's notebook is great as is, you can take it to the next level by adding embellishments, monogram stickers, or more pretty things.
Include paper clips or ribbons for page holders, book marks and pens with your gift.
Other Notebook And Journal Gift Giving Ideas:
Here are a few more ways you can personalize a traveler's notebook as a gift.
- Prayer Journal
- Baby's First Year (with pockets for a hair locket, notes and cards)
- Christmas Gift Planner (with pockets for receipts)
- Christmas Recipes
- Christmas Menu
- Christmas Card List
- Holiday Party Planner
- New Years Goal Planner
- Bucket List Starting Planner
BONUS FREE DOWNLOAD
Save Money On Your Craft Supplies
Download this FREE Guide to find 25 Ways to save money when you buy craft supplies so that your beautiful creations cost less.
Save Money On Your Craft Supplies
Download this FREE Guide to find 25 Ways to save money when you buy craft supplies so that your beautiful creations cost less.
How Much Do Traveler's Notebooks Cost?
- Notebook – My notebook has lined paper, but a plain one works also. (I got a 3 pk of notebooks @ Hobby Lobby for $6.99, and used my 40% Off coupon to get it cheaper = $4.19 = $1.40 each. I've also seen a similar three pack in the One Spot at Target for $5.)
- Scrapbook Paper – at least 1 piece (big enough that it will cover the journal on both sides of the cover) – 25¢ a sheet (@ Craft Stores. My notebook was 5-9/16″ wide so a 12″x12″ sheet of paper would work perfectly with room to spare.)
- Vellum Paper to make pockets
- Mod Podge – $1 (@ Dollar Tree)
- Scissors
- Paint Brush or Foam Brush
- Washi Tape
Total Cost – As Low As: $2.40 (1 notebook (w/coupon) & 4 sheets scrapbook paper)
As you can see, these handmade traveler’s notebooks are a great item to give and they are so cheap to make too!
And these handmade traveler’s notebooks are quick to make too because they can be made them in less than one Netflix show!
YOUR TURN: What kind of handmade traveler's notebook are you going to make first? Let me know in the comments below!