Not only are they so easy to use and to clean up, but they can make great gifts too!
Did you know that you can glass etch them? You can! That's why I decided to make this DIY etched casserole dish for a gift this year!
And this is just the start of these easy DIY etched glass ideas that you can make too!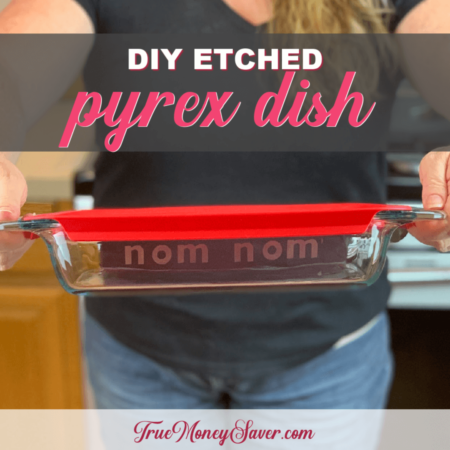
Don't worry! This tutorial on how to etch glass will show you step by step what to do to make your very own gifts!
You might be thinking that etching these Pyrex baking dishes is hard. But they're not hard at all! If you can use a paint brush, you can etch!
After creating your design, it only take about 15 minutes to complete!
And it's something that you made with your own hands that is super personal! Your friends and family are going to love them! Especially the bakers!
This post is part of our 30 Days of Homemade Gifts Series. 30 gifts that are easy (and cheap) to make, but also something you’ll be proud to give.
Each Homemade Gift has to meet 5 stipulations in order to maximize your money and make it easy for a busy mom to do:
- Easy to obtain supplies – Supplies are things you might already have on hand or are easy to find at Walmart or a craft store so you can get them in the same day you want to make it.
- Easy to make – Supplies are easy to work with or use so that anyone could do it… not caustic… so you could do the craft with your kids.
- Quick to make – It can be made in 30 minutes or less so it’s possible to make this gift in the middle of the night with products you most likely already have on hand. (Note: The 30 minute guide is your “hands on” time, dry time is excluded.)
- Cheap to make – You should be able to make the project without spending more than $10.
- Substantial – Each gift is “big” enough that you'll feel confident giving it alone and not having to add a gift card to it.
BONUSES:
Multiple uses – Multiple gifts can be made out of the same supplies giving you options to use up all the supplies you buy.
Saving Money Double Bonus: Try to think about what you already have on hand to upcycled and save more money.
Are you ready to learn how to etch glass? Let's get busy!
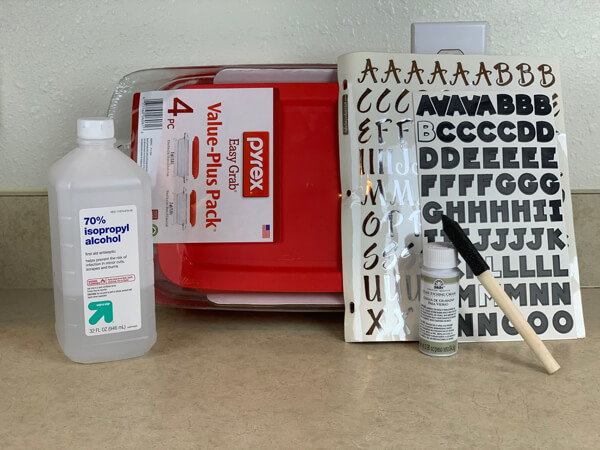
Supplies:
- Pyrex Baking Dishes (2 qt. dish w/lid – prices start at $9.97 @ Walmart)
- Armour Etch 3 oz – $10.99 (@ Hobby Lobby, use 40% coupon to get it cheaper)
- Paint brush – $1 (@ Dollar Tree)
- Stickers, Contact paper or Stencil blanks (prices start at $1.99 @ Hobby Lobby)
- If using Contact Paper: X-Acto Knife (prices start at $4.59) or Swivel Knife ($5.99 – goes 50% Off @ Hobby Lobby)
- If using Contact Paper: Cutting mat (prices start at $5.99 @ Hobby Lobby)
- If using Contact Paper: Sharpie
- Paper towels
- Paint Brush
- Printed Design or Monogram (if not using stickers)
- Masking Tape
- Rubbing Alcohol
- Timer
- Dish soap
Creating Your Pyrex Baking Dishes Design:
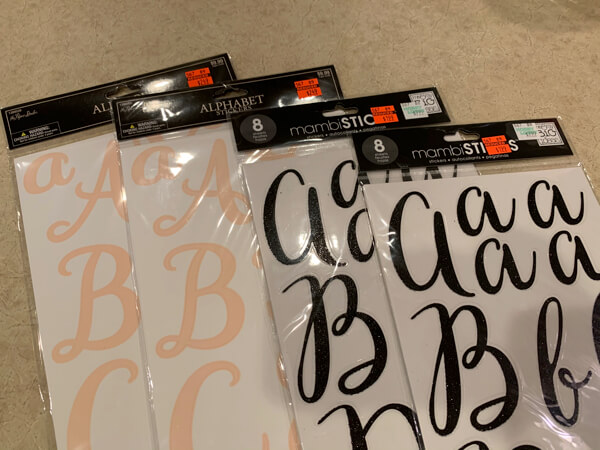
Option 1: Stickers Or Sticker Outlines
First, you will need to find stickers that will work for the size of your Pyrex baking dishes. Make sure they are the right size and shape for your dishes.
Note: If you are going to do a monogram or name, make sure that not only do they fit, but that the stickers or sticker outlines are the actual shape that you want. You have to pay attention to the outline of the shape that will appear after the etching cream has been wiped away.
Option 2: Contact Paper
Find or create a design you want to use on your Pyrex baking dishes. Make sure the design is simple and that the cutting areas are not too thin.
Print out your design and trace onto contact paper. Cut your piece of contact paper bigger than your design by at least 1-2″. This will help the contact paper adhere to your project without allowing any etching creme to seep into areas where you don't want it to go.
I bet this easy DIY etched glass idea will be just the start to your wanting to etch everything in sight! It's so much fun!
BONUS FREE DOWNLOAD
Save Money On Your Craft Supplies
Download this FREE Guide to find 25 Ways to save money when you buy craft supplies so that your beautiful creations cost less.
Save Money On Your Craft Supplies
Download this FREE Guide to find 25 Ways to save money when you buy craft supplies so that your beautiful creations cost less.
Directions:
Before you begin you'll want to wash and dry your glass to remove any fingerprints, oil and residue.
Etching cream is easy to work with, but it does start to make a mark right away. Keep your paper towels handy just in case because any drips need to be wiped off immediately!
It will take a full 15 minutes to fully etch the design in the glass. Check the directions on the cream you use, my cream said it would take 15 minutes and I wanted to see what it would look like after longer time. It didn't look any different when I left it on for 30 minutes and an hour, so 15 minutes will surely suffice.
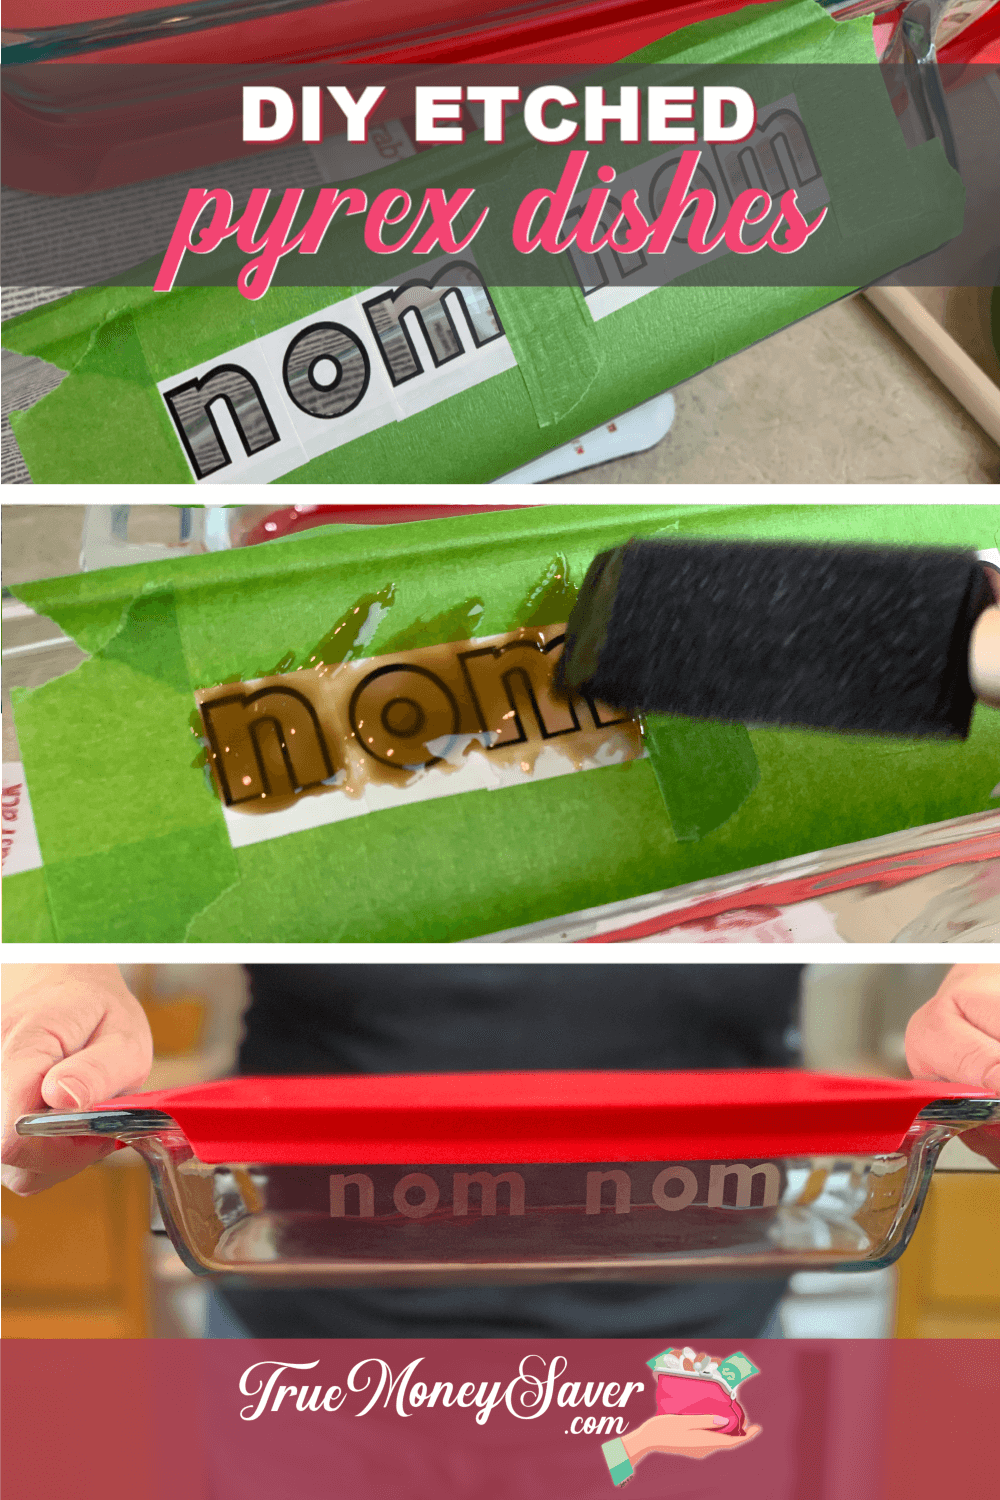
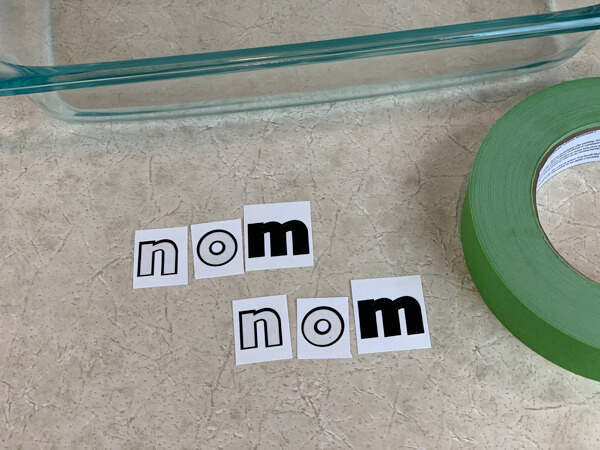
Step 1: Apply Your Stickers or Stencil
Apply the stickers or stencil where you want the etching to occur. You could use the “positive space” of the sticker to create an etch around the words you use, OR you could use the “negative space” to etch the actual words.
In this example I used the negative space to make my etching of the words “nom nom”.
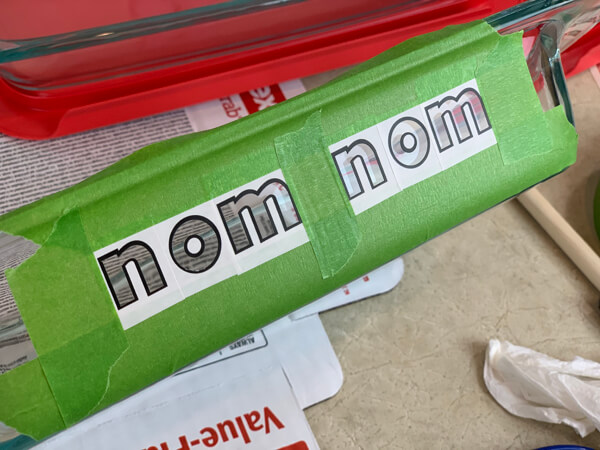
Step 2: Mask Off Area That Will Not Get Etching Creme
Mask off any part of the area you DO NOT want the etching creme to etch on the Pyrex baking dishes where you are working.
If you think you might be messy, use cut part of a plastic bag and mask any areas off.
One thing you have to think about with this DIY etched casserole dish, is that the etching creme starts working right away. Keep those paper towels handy just in case. Any drips need to be wiped off immediately!
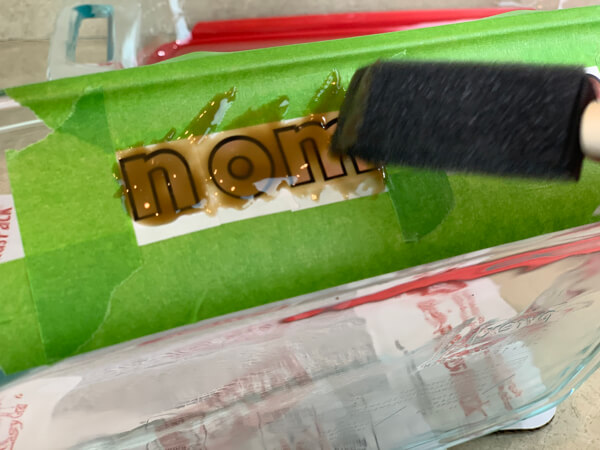
Step 3: Apply Etching Creme
Quicky before you apply the cream, use the rubbing alcohol wipe where the etching creme will go. This will make sure that the etching cream will do it's magic.
Start to apply the etching creme to your Pyrex baking dishes with your paint brush.
Make sure you get enough on the glass so that it completely covers your design. I glop it on good.
Don't forget to start your timer according to the bottle directions.
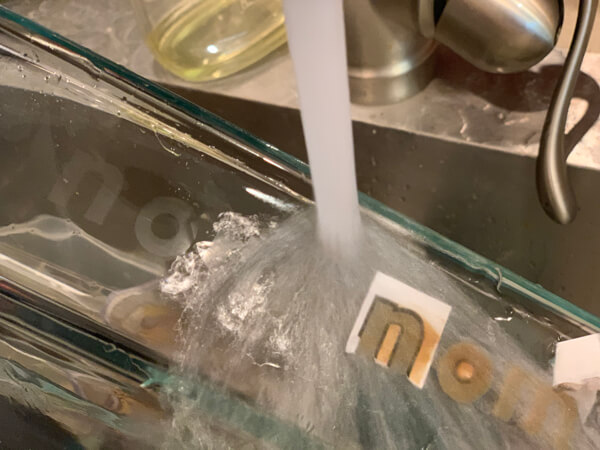
Step 4: Wash Glass
Once the timer goes off, wash the glass under warm water and rinse off all the etching creme completely.
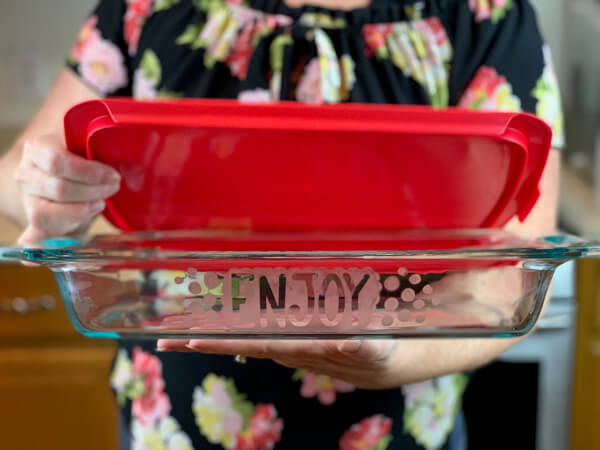
You are going to love how this DIY etched casserole dish turns out!
BONUS FREE DOWNLOAD
Save Money On Your Craft Supplies
Download this FREE Guide to find 25 Ways to save money when you buy craft supplies so that your beautiful creations cost less.
Save Money On Your Craft Supplies
Download this FREE Guide to find 25 Ways to save money when you buy craft supplies so that your beautiful creations cost less.
I used a dobber I had in my scrapbook tool drawer to make a dot all the way around the letters so that I didn't have to worry about making a straight lined circle or rectangle.
What does it cost?
With this gift, there are several ways to reduce the price by simply looking for sales and using coupons at your craft store. I'm going to estimate the highest cost, just to be on the conservative side.
- Pyrex Baking Dishes (2 qt. dish with lid – prices start at $9.97 @ Walmart, also watch for Buy One Get One sales at your local grocery store, they are on sale regularly near me)
- Armour Etch 3 oz – $9.99 (@ JoAnn's, use 40% coupon to get it cheaper)
- Paint brush – $1 (@ Dollar Tree)
- Stickers, Contact paper or Stencil blanks (prices start at $1.99 @ Hobby Lobby)
- If using Contact Paper: X-Acto Knife (prices start at $4.59) or Swivel Knife ($5.99 – goes 50% Off @ Hobby Lobby)
- If using Contact Paper: Cutting mat (prices start at $5.99 @ Hobby Lobby)
- If using Contact Paper: Sharpie
- Paper towels
- Printed Design or Monogram
- Masking Tape
- Rubbing Alcohol
- Timer
Total Cost: $18.55 (Pyrex dish, Amour Etch, Stickers)
As you can see, Pyrex baking dishes are simple to etch and make them into a personalized gift.
Basically, if you can use a paint brush, you can etch!
And after making your design, it really only takes about 15 minutes to complete! That's super fast!
Plus, it’s something that you made with your own hands that is super personal! I hope you truly love giving these personal gifts to your friends and family this year!
YOUR TURN: Are you going to etch your own Pyrex Baking Dishes now? Let me know in the comments below!