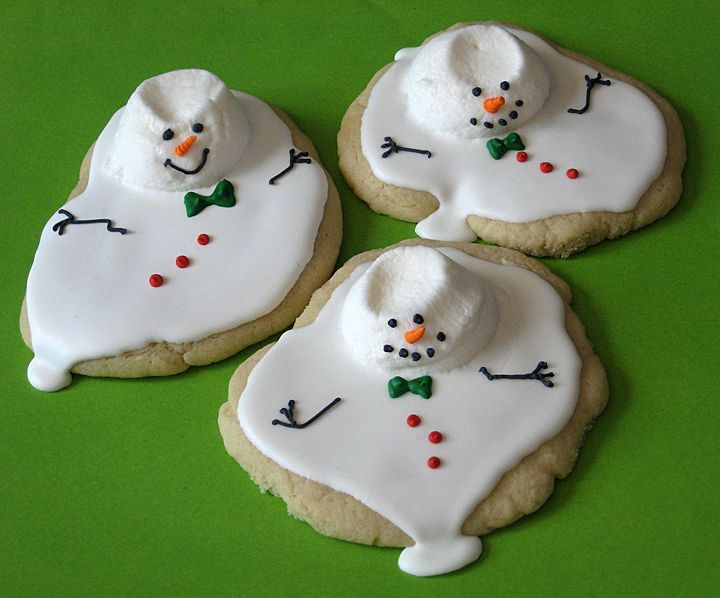
I saw these cookies last Christmas and fell in love instantly!
Aren't they about the cutest cookies you've ever seen! (My daughter says they are kind of sad because they're “melted.”)
These are on my list to bake this year for sure!
Recipe and photo credit to TrulyCustomBakery.com.
Melted Snowman Cookies
What you’ll need for about 24 Snowman Cookies:
- Chilled Sugar Cookie Dough
You can use the pre-made kind you find in the refrigerated section of the grocery store or make your own from scratch. Here‘s a great recipe if you want to make your own sugar cookie dough.
NOTE: Start with the dough chilled in the refrigerator at least 4 hours before beginning the baking/decorating process.
For Decorations:
- Large Marshmallows
- Royal Icing (Choose a Recipe from All Recipes )
- Icing Colors (Food Color or Wilton Gel Colors of your choice. You can find the Wilton Colors at a Craft Store)
- Silver Dragees, Mini Chocolate Chips, or other little candy pieces you could use for buttons and accessories on your snowman. (You can pipe these details in royal icing OR use accessories. For kids… accessories are easier.)
- Parchment Paper
- Shortening
BONUS FREE DOWNLOAD

Planning Is Key During The Holidays
Download these FREE Christmas Prep Cheat Sheets so you get ahead (of the spending) this year.
Directions:
Cookie Directions:
- After your dough has chilled for at least 4 hours, prepare your work surface.
- You'll need flour, a couple of cookie sheets lined with parchment paper, a spoon or cookie scoop, and a pre-heated oven.
- Using a cookie scoop or a tablespoon, scoop a small ice cream scooped size of dough and sprinkle it with flour. This is important if you don't want the dough sticking to your hands.
- Roll the dough into a ball and start to press it flat. Make it so it has a real wavy kind of funky look to it. The ultimate goal is a puddle. There is no right shape.
- Start forming it in your hand and then set it on the cookie sheet and press it down until it's about half an inch thick. Make them all different.
- Repeat that step with each cookie. You'll want to get them as close to the same size as possible but they don't have to be exact.
- Bake according to your recipe directions.
Icing:
- While the cookies baking, go ahead and make your Royal Icing Recipe. You can find several on AllRecipes.com.
- Now that your icing is made and your cookies have cooled, you are ready for the next step.
Decorating:
- Place a piece of parchment paper on your work surface and pick a couple of cookies to start with.
- Spoon a small puddle of icing onto your cookie and using the back of a spoon or a knife spread it around making sure to go right to the edges in some spots so he looks drippy.
- Next, liberally grease a plate or silicone mat with shortening.
- And place about 8 marshmallows on the mat, spaced out.
- Set your microwave for 20 seconds and DO NOT WALK AWAY. Watch the marshmallows.
- As they start to puff up, you are ready to go. Don't let them get huge or melt. You just want them to puff. Stop your microwave BEFORE they double in size.
- Liberally grease your fingers and pick up one marshmallow at a time and kind of smush it into place. You don't have to be neat or perfect, just get it on there. The marshmallow should not stick to your fingers as long as you have shortening on them.
- Repeat this step for each cookie and then let the icing set up just a bit.
- Add the details of eyes, nose, arms, buttons, etc.
- You can use piped Royal Icing, chocolate chips, sprinkles, fruit strips or just about anything.
We found several versions of this recipe online, but it seems to have originated (as far as we can tell) with Truly Custom Cakery.
They have an amazing tutorial with step-by-step instructions. Go HERE to see the tutorial and lots of decorating ideas for these Melted Snowmen!