~ Tips for Cooking Your Turkey~
This week, instead of giving you Meals from Our Deals, we thought we’d give you some tips on cooking turkey. Whether you bake yours or fry it (we do BOTH!), you can find some helpful info here.
Thawing Your Turkey: Hopefully if you purchased a frozen turkey, it’s already mostly thawed out. Thawing a frozen turkey requires patience. The safest method is to thaw turkey in the refrigerator. Be sure to plan ahead — it takes approximately 3 days for a 20 pound turkey to fully defrost.
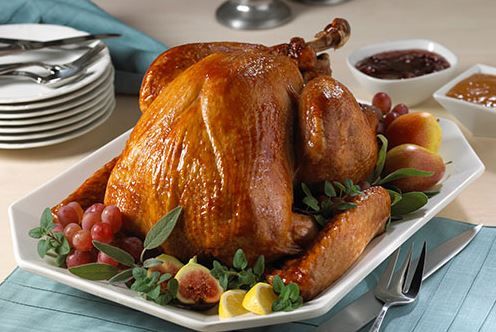
 Turkey in the Oven
1. For crisper skin, unwrap the turkey the day before roasting and leave it uncovered in the refrigerator overnight.
2. Cooking times will differ depending on whether your bird was purchased fresh or frozen. Plan on 20 minutes per pound in a 350 degree F oven for a defrosted turkey and 10 to 15 minutes per pound for fresh.
3. A turkey will cook more evenly if it is not densely stuffed. Consider adding flavor by loosely filling the cavity with aromatic vegetables — carrots, celery, onion or garlic work nicely — or by carefully tucking fresh herbs underneath the breast skin. For the stuffing lovers, cook the dressing in a casserole dish on the side.
4. For even roasting, truss your turkey.
5. Before roasting, coat the outside of the turkey with vegetable or olive oil, season with salt and pepper and tightly cover the breast with aluminum foil to prevent over-browning (it will be removed in step 7).
6. Don’t be a peeping tom (no pun intended)! Once you get the turkey in the oven, resist the temptation to open the oven door and admire your handiwork. When the oven temperature fluctuates, you’re only increasing the likelihood of a dry bird. About 45 minutes before you think the turkey is done, remove the foil from the breast to allow it to brown.
7. Remove the turkey from the oven when the deepest spot between the leg and the breast reads 180 degrees F on an instant-read thermometer. Check the internal temperature of the stuffing as well; it should be at least 165 degrees.
8. Tent the bird with foil and let rest for about 15 minutes before carving. If you need more time to make gravy, heat up side dishes, etc., you can let the turkey set for up to an hour without losing too much heat.
9. Remember to carve your turkey with a very sharp or electric knife.
Thanks to FoodNetwork.com for these tips!
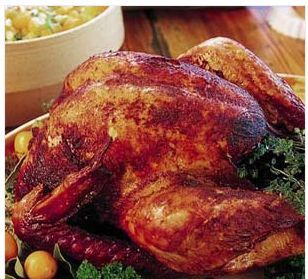
 Turkey in the Fryer
We’ve included safety tips and cooking tips. Please be safe if you fry your turkey!
Never deep-fry inside your home! Every year you hear the story of some guy who burned down his home on Thanksgiving because he tried to fry a bird in the kitchen. Don’t be that guy.
Cordon off the cooking area. No pets and definitely no children in the area. The hot oil is very, very dangerous and a lot of things can go wrong. Just keep everyone away but the cook and maybe an assistant. Definitely a case where “too many cooks in the kitchen” can be a recipe for disaster.
Make sure your deep-fry burner has a very sturdy base. Make sure it’s got a good, wide base. Fill the deep-fry bucket with some water first, too, and kind of move it around on the base to feel it out. If it doesn’t feel safe, get a new base. The lower and sturdier the better.
Get a big deep-fry pot. Some deep-fry pots are just 28 or 30 quarts. These are too small if you ask me. And not as safe because of the bubbling nature of oil. So get a 34- or 36-quart pot. Remember, you can also use this rig for seafood and lobster boils, too. So bigger pots will provide more uses and options – especially for big parties.
Keep the birds to a manageable size. An 8- to 12-pound bird is the recommended size for several reasons. One, they cook properly (crispy outside, cooked throughout inside); and, two, they fit in the pot. I’ve found a 12-pound bird is really about the upper limit you want to put inside a 34-quart pot.
Know how much oil will safely fit in your deep-fry pot. A 10-pound bird is going to displace quite a bit of oil. In addition, the oil bubbles crazily when you first add the bird, which has a lot of natural moisture in it. You can test first by filling the pot about halfway with water (or even cold oil) and dipping in the bird you’re going to cook. You’ll know then how much higher the oil will go. And always remember that it’s going to bubble up several more inches when you first drop in the bird.
Shut off the fuel when adding your turkey to the oil! This is a critical step that will save you a lot of trouble. You can have a really bad – dangerous, even deadly – fire if the oil bubbles over and the propane flame underneath catches on. Bad news.
So once the oil gets to temperature, shut off the fuel before lowering the bird into the pot. If the oil does overflow – an event you can minimize with experience – it won’t ignite. Then, as long as the outside of the pot and burner aren’t covered in oil, just turn the fuel back on. Takes two seconds but prevents a lot of potential problems.
Wear high-quality oven mitts or gloves and lower the bird into the pot very slowly! The oil will bubble at first, sometimes a surprising amount. Add the bird slowly and you’ll keep the bubbling to a minimum.
 Frying Tips
1. Peanut oil is generally considered the best for deep-frying turkeys. It burns hot and can be used many times, actually. I might cook several birds or wings or whatever in the same oil before replacing it.
2. Cook the bird in oil that’s between 350 degrees and 375 degrees. Any lower and the bird won’t crisp up properly. Any hotter and the outside will burn before the inside cooks.
3. Get the oil temperature up to around 390 or so before lowering the bird for the first time. The oil temperature will drop dramatically once you place a cold bird into it. Then just make sure it stays between that 350- to 375-degree range.
4. Buy an 8- to 12-pound bird. Those cook best: crispy on the outside and cooked perfectly on the inside.
5. The general rule is about 3½ minutes of cooking time per pound.
6. You’ll need two thermometers. A long candy thermometer with a clip that you’ll attach to the side of the pot, the basket or the basket handle to track the temperature of the oil; and you’ll need a meat thermometer.
7. The bird is done when the breast temperature reaches 170 to 180 degrees. But don’t check the internal temperature until the bird is safely out of the oil.
8. Remove the basket with the bird from the oil – slowly and carefully – and place on your cutting surface, preferably with some paper shopping bags underneath. Helps soak up the oil.
9. Let it rest for 10 to 15 minutes before carving.
Thanks to the BostonHerald.com for these tips.
Happy Turkey Day!!
If you have a favorite recipe that matches with a weekly sale or includes items you typically have in your stockpile, please submit your recipe to [email protected] with “Recipe” in the subject line.
Your recipe could be featured on True Couponing as our Recipe of the Week!
