Do you have a sun catcher memory? Mine goes back to my grandmothers living room. She had beautiful crystal sun catchers in almost every window. And since her living room faced east, each morning the sun would come bursting in filling the room with sparkles. It was beautiful!
Since each person seems to have a connection with crystal sun catchers, it only seems fitting to figure out a way to DIY them for great gifts. 
Plus, I’ve found an easy way to create beautiful Swarovski crystal sun catchers that are not only very easy but super cheap too. #winwin
It all takes a little planning to catch a sale at your craft store, but it will be worth it once you find your deal. And even if you pay full price… it’s not very expensive, and totally worth it.
For these simple DIY crystal sun catchers, you can make them in under 20 minutes each. And once you get the hang of the process, it will take you considerably less time.
Plus, you can make one for only around $5 each. Isn’t that exciting?!!
Plus, this is a fun project that you can get the family involved. The kids can help to string the beads, and of course, help you pick them out.
This post is part of our 30 Days of Homemade Gifts Series. 30 gifts that are easy (and cheap) to make, but also something you’ll be proud to give.
Each Homemade Gift has to meet 5 stipulations in order to maximize your money and make it easy for a busy mom to do:
- Easy to obtain supplies – Supplies are things you might already have on hand or are easy to find at Walmart or a craft store so you can get them in the same day you want to make it.
- Easy to make – Supplies are easy to work with or use so that anyone could do it… not caustic… so you could do the craft with your kids.
- Quick to make – It can be made in 30 minutes or less so it’s possible to make this gift in the middle of the night with products most likely already have on hand. (Note: It takes extra dry time and baking time for this project.)
- Cheap to make – You should be able to make the project without spending more than $10.
- Substantial – Each gift is “big” enough that you’ll feel confident giving it alone and not having to add a gift card to it.
BONUSES:
Multiple uses – Multiple gifts can be made out of the same supplies giving you options to use up all the supplies you buy.
Saving Money Double Bonus: Try to think about what you already have on hand to upcycled and save more money.
So are you excited about learning how to make these Swarovski crystal sun catchers? Let’s get to DIYing!
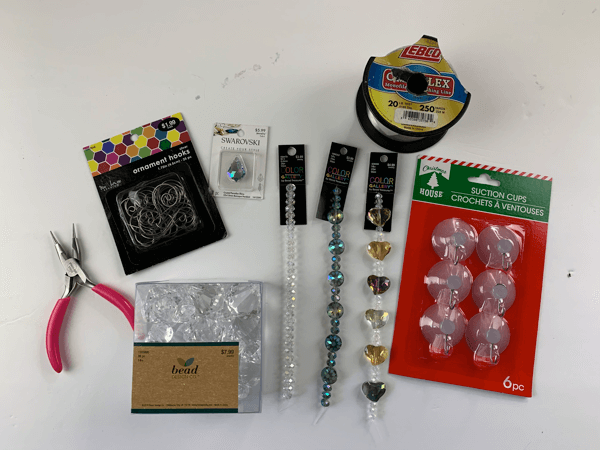
Supplies:
- Strands of Beads (@ Walmart, Hobby Lobby or any Craft Store)
- Swarovski Crystal Beads Tear Drop Beads or Pear Drop Beads
- Fishing line or bead thread (make sure it does not stretch)
- Round Nose Pliers that also cut wire
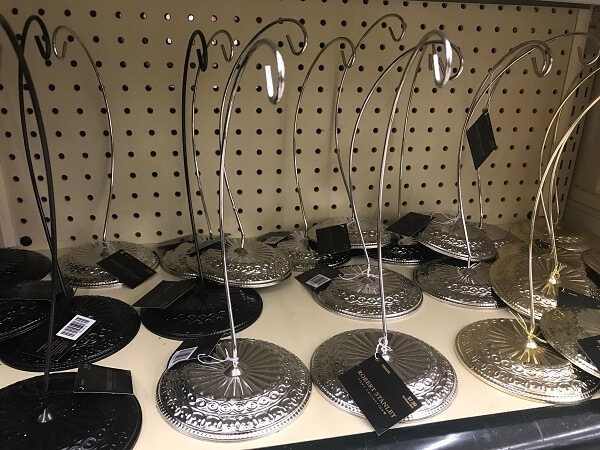
- Frilly ornament hangers 25 pk
- Scissors for cutting line
- Round Jump Rings (I use the 9mm size because that’s what I had on hand, but it was not large enough for the large crystals, so you would want to take that into consideration if you want to use the large crystal)
Optional or Substitute Items:
- 1- pkg. Diamond Drop Beads 39 ct
- 20 gauge Silver Plated Craft Wire
- Suction Cups with Hooks
- Chandelier parts
The Swarovski crystal is the most expensive part of this gift. You can substitute them with less expensive options such as plastic crystals, chandelier parts or diamond drop beads.
I’ve found beautiful vintage beads at thrift stores or antique stores for very reasonable prices, so think outside the box when looking for supplies. You might even have a box of old jewelry from your grandmother that you can dig through to make this project.
Swarovski crystal beads do go on sale but I’ve never seen them on sale the same week as the bead strands. You’ll see them discounted up to 50% off (unless you find them on clearance as a bonus!).
BONUS FREE DOWNLOAD
Save Money On Your Craft Supplies
Download this FREE Guide to find 25 Ways to save money when you buy craft supplies so that your beautiful creations cost less.
Save Money On Your Craft Supplies
Download this FREE Guide to find 25 Ways to save money when you buy craft supplies so that your beautiful creations cost less.
Directions To Make A Swarovski Crystal Sun Catcher:
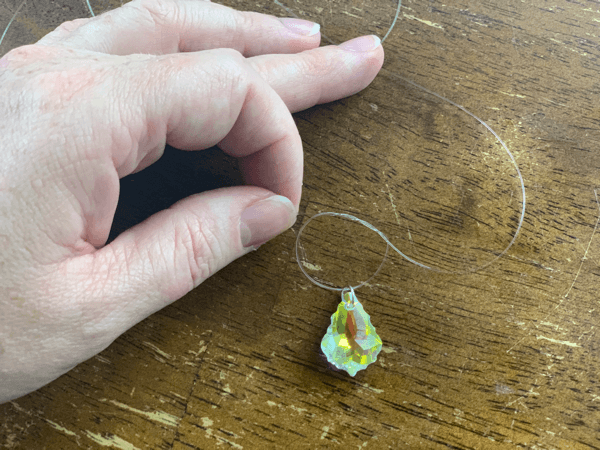
Step 1: Attach The Jump Ring To The Swarovski Crystal
Open the jump ring with your pliers (and your finger) and put the Swarovski crystal onto the jump ring.
Close the jump ring with your pliers.
Here is a great guide to opening a jump ring correctly. (I just used my fingers to hold one side instead of using two pliers.)

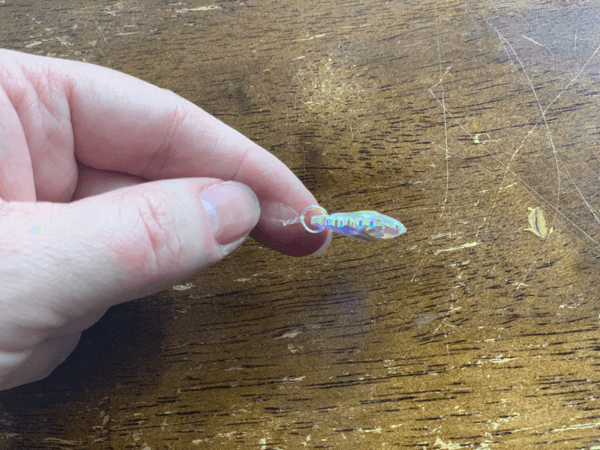
Step 2: Attach Your Swarovski Crystal To The Fishing Line
Take your fishing line and cut about 1 yard.
Tie fishing line onto the jump ring with a surgeons knot. Basically, you just thread the end of the string through the loop twice (similar to tying a double knot) and then pull.
This will ensure the slipery plastic fishing line doesn’t come untied and is securely connected to the jump ring holding your Swarovski crystal.
The surgeons knot looks kinda large, don’t worry, the first bead will cover it up.
This is the time to double check that your jump ring is completely closed. If it’s not, your line could slip through and fall off the jump ring.
This Swarovski crystal is just the start to a beaming sparkly sun catcher!
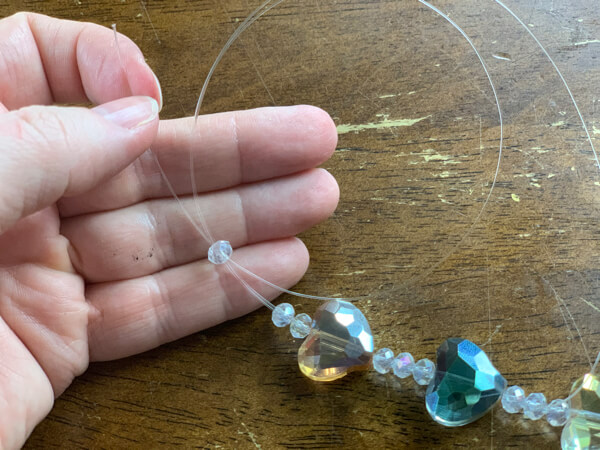
Step 3: Beading The Strands
Unhook the end of the bead strand. You will see that the last bead has been tied.
DO NOT take the beads off the original strand! I have an simple and mess-free way of getting them onto the new fishing line.
You’ll need to cut the old strand for the last (or first) bead in order to unhook them from the other string. Take the ends of your new line that is attached to your Swarovski crystal and start threading them in the beads that are still beaded on the old line.
Try to only do one bead at a time, making sure you have gotten each bead onto BOTH strands of the new line.
The bigger the bead, the easier it will be to thread each bead onto the new plastic fishing line.
You might have to some beads that are too small and need to come off the old strand and beaded onto the new strand, that’s okay, I’m just trying to save you a little time from completely unstringing the old beads and then restringing them on your new line.
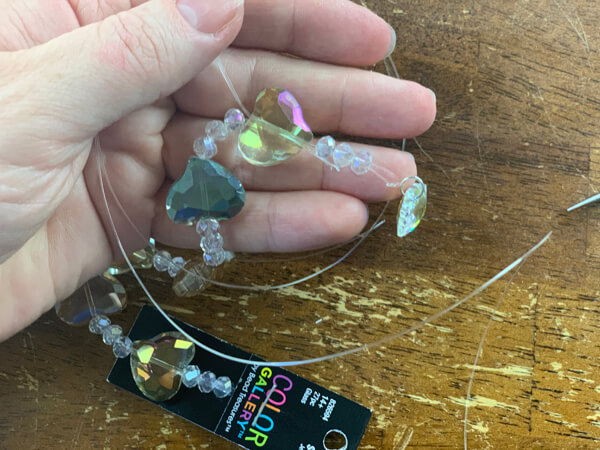
Step 4: Continue Moving Beads To New Strand
Continue threading each bead from the old strand onto your new strand.
It’s so easy to do it this way! These Swarovski crystal sun catchers are gonna look great in the window!
Step 5: Lock The First Bead
When you have finished threading all the beads onto the new line, now is the time to lock those beads into place.
First, take one strand of the line, and fish it around and back through the first bead. Yes, this means the plastic strand will be on the outside of the bead, I promise no one will see it.
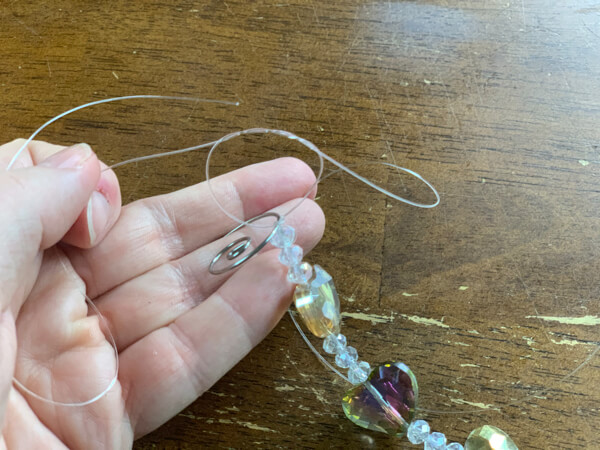
Step 6: Tying Your Swarovski Crystal Sun Catchers To Hang
First, thread one of the fishing line through the hanger.
Then, make a surgeons knot just like you made at the end with the Swarovski Crystal.
Make sure to pull the string taunt so the beads are locked into place.
You can tie them together at this point, or you can tie them to a loop for hanging.

Step 7: Hide The Strings
To hide the extra string, push both strands back through the first couple of beads. Then clip those strands.
This makes the knot at the top more tidy and helps to hold the knots.
See how these beautiful crystal sun catchers will look once you are done?!
These display hangers are great because they can sit under an end table lamp and project sparkles all night long, not just during the day.
Other Swarovski Crystal Gift Ideas:
- Christmas Ornaments, Swirl Ornaments
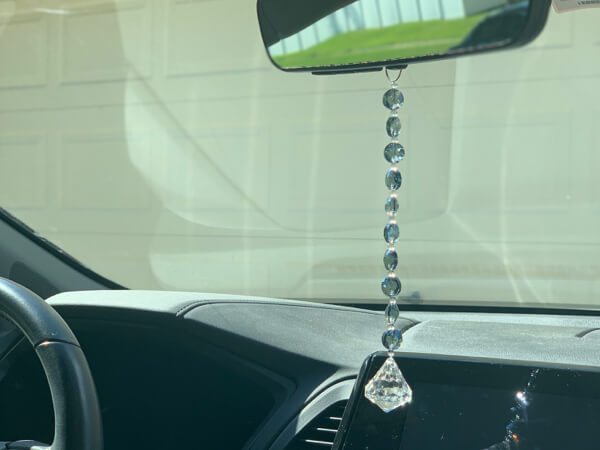
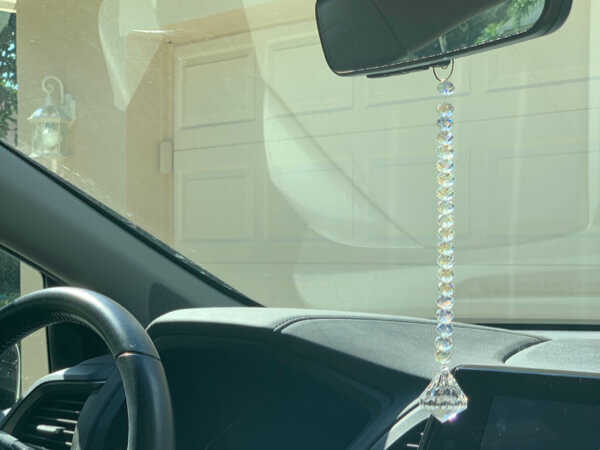
- Rearview Mirror Hanging Crystals
- Keychains
- Fan Pulls
- Baby Mobile
- Bookmarks
- Purse Bling Chains
BONUS FREE DOWNLOAD
Save Money On Your Craft Supplies
Download this FREE Guide to find 25 Ways to save money when you buy craft supplies so that your beautiful creations cost less.
Save Money On Your Craft Supplies
Download this FREE Guide to find 25 Ways to save money when you buy craft supplies so that your beautiful creations cost less.
You could even make some really pretty eyeglass chains! That would make a great gift for your eyeglass wearing friends!
What Does A Swarovski Crystal Sun Catcher Cost?
- Strands of Beads – The ones pictured were: Crystal Strand $1.49 and Heart Strand $2.50 after 50% Off sale
- Swarovski Crystal Beads – $3 after 50% Off Sale
- Fishing line or bead thread (that does not stretch) – $5.99 Free if you already have some
- Round Nose Pliers that also cut wire – $0
- Pretty ornament hangers 25 pk – $1.99 (8¢/each)
- Scissors for cutting line – $0
- 9mm Round Jump Rings 100 ct – $2.99 (3¢/each)
Optional or Substitute Items:
- 1- pkg. Diamond Drop Beads 39 ct – $7.99 (used 40% Off Coupon = $4.79 = 13¢ each)
- 20 guage Silver Plated Craft Wire – $5.99
- Suction Cups with Hooks 12 pk – $1.99 (17¢/each)
- Chandelier parts – $7.99 (75¢/each)
Heart Strand Swarovski Crystal Sun Ccatcher = $5.61 (bead strand, Swarovski crystal, jump ring, swirly ornament hanger)
Or, as low as $2.88 each (bead strand, diamond drop plastic bead, jump ring pretty ornament hanger)
The best thing about these Swarovski crystal sun catchers is that you can make one in under 10-20 minutes! Great for busy moms like us!
They are so easy to make and for around $5 each, you can make a sparkly gift for everyone you know.
YOUR TURN: Who are you going to give your Swarovski crystal sun catchers to? Let me know in the comments below!

More Fun Articles To Read: